Hidden Compartment Entertainment Center Build
The finished product! Read below to hear the whole story.
When we moved into our current home back in 2017 my husband had all kinds of ideas about how we could maximize our storage space for his TV and gaming equipment. There happened to be a poorly built DIY closet in our bedroom directly behind the wall of our living room where we wanted to mount our TV, and so we started by using a simple shelf in there to house his gaming systems and A/V receiver with a hole in the wall to route the cables. This looked great from the living room where only our TV was visible. All other cords and devices were hidden behind the wall. But it was a horribly inefficient use of space in our ugly bedroom closet.
Over the next three years my husband’s ideas for the space slowly evolved until he eventually put his design skills to work and created a mockup of a multi-purpose entertainment center. Then finally, during the winter of 2020 the opportunity arose for us to make this dream a reality. When we were done we had a 7 foot tall combination clothes dresser, bookshelf, and entertainment center that powered two TVs in different rooms! Here’s how we did it.

There are lots of different 3D software options for creating early mockups.
The build started with these rough 3D plans my husband designed earlier that summer. While we sourced the wood and hardware we also began the demolition of the old closet. Unfortunately, I don’t have any photos of the old setup, but trust me when I say that it was very sad and very ugly.
Special appearance by our Charlie Brown Christmas tree in the back.
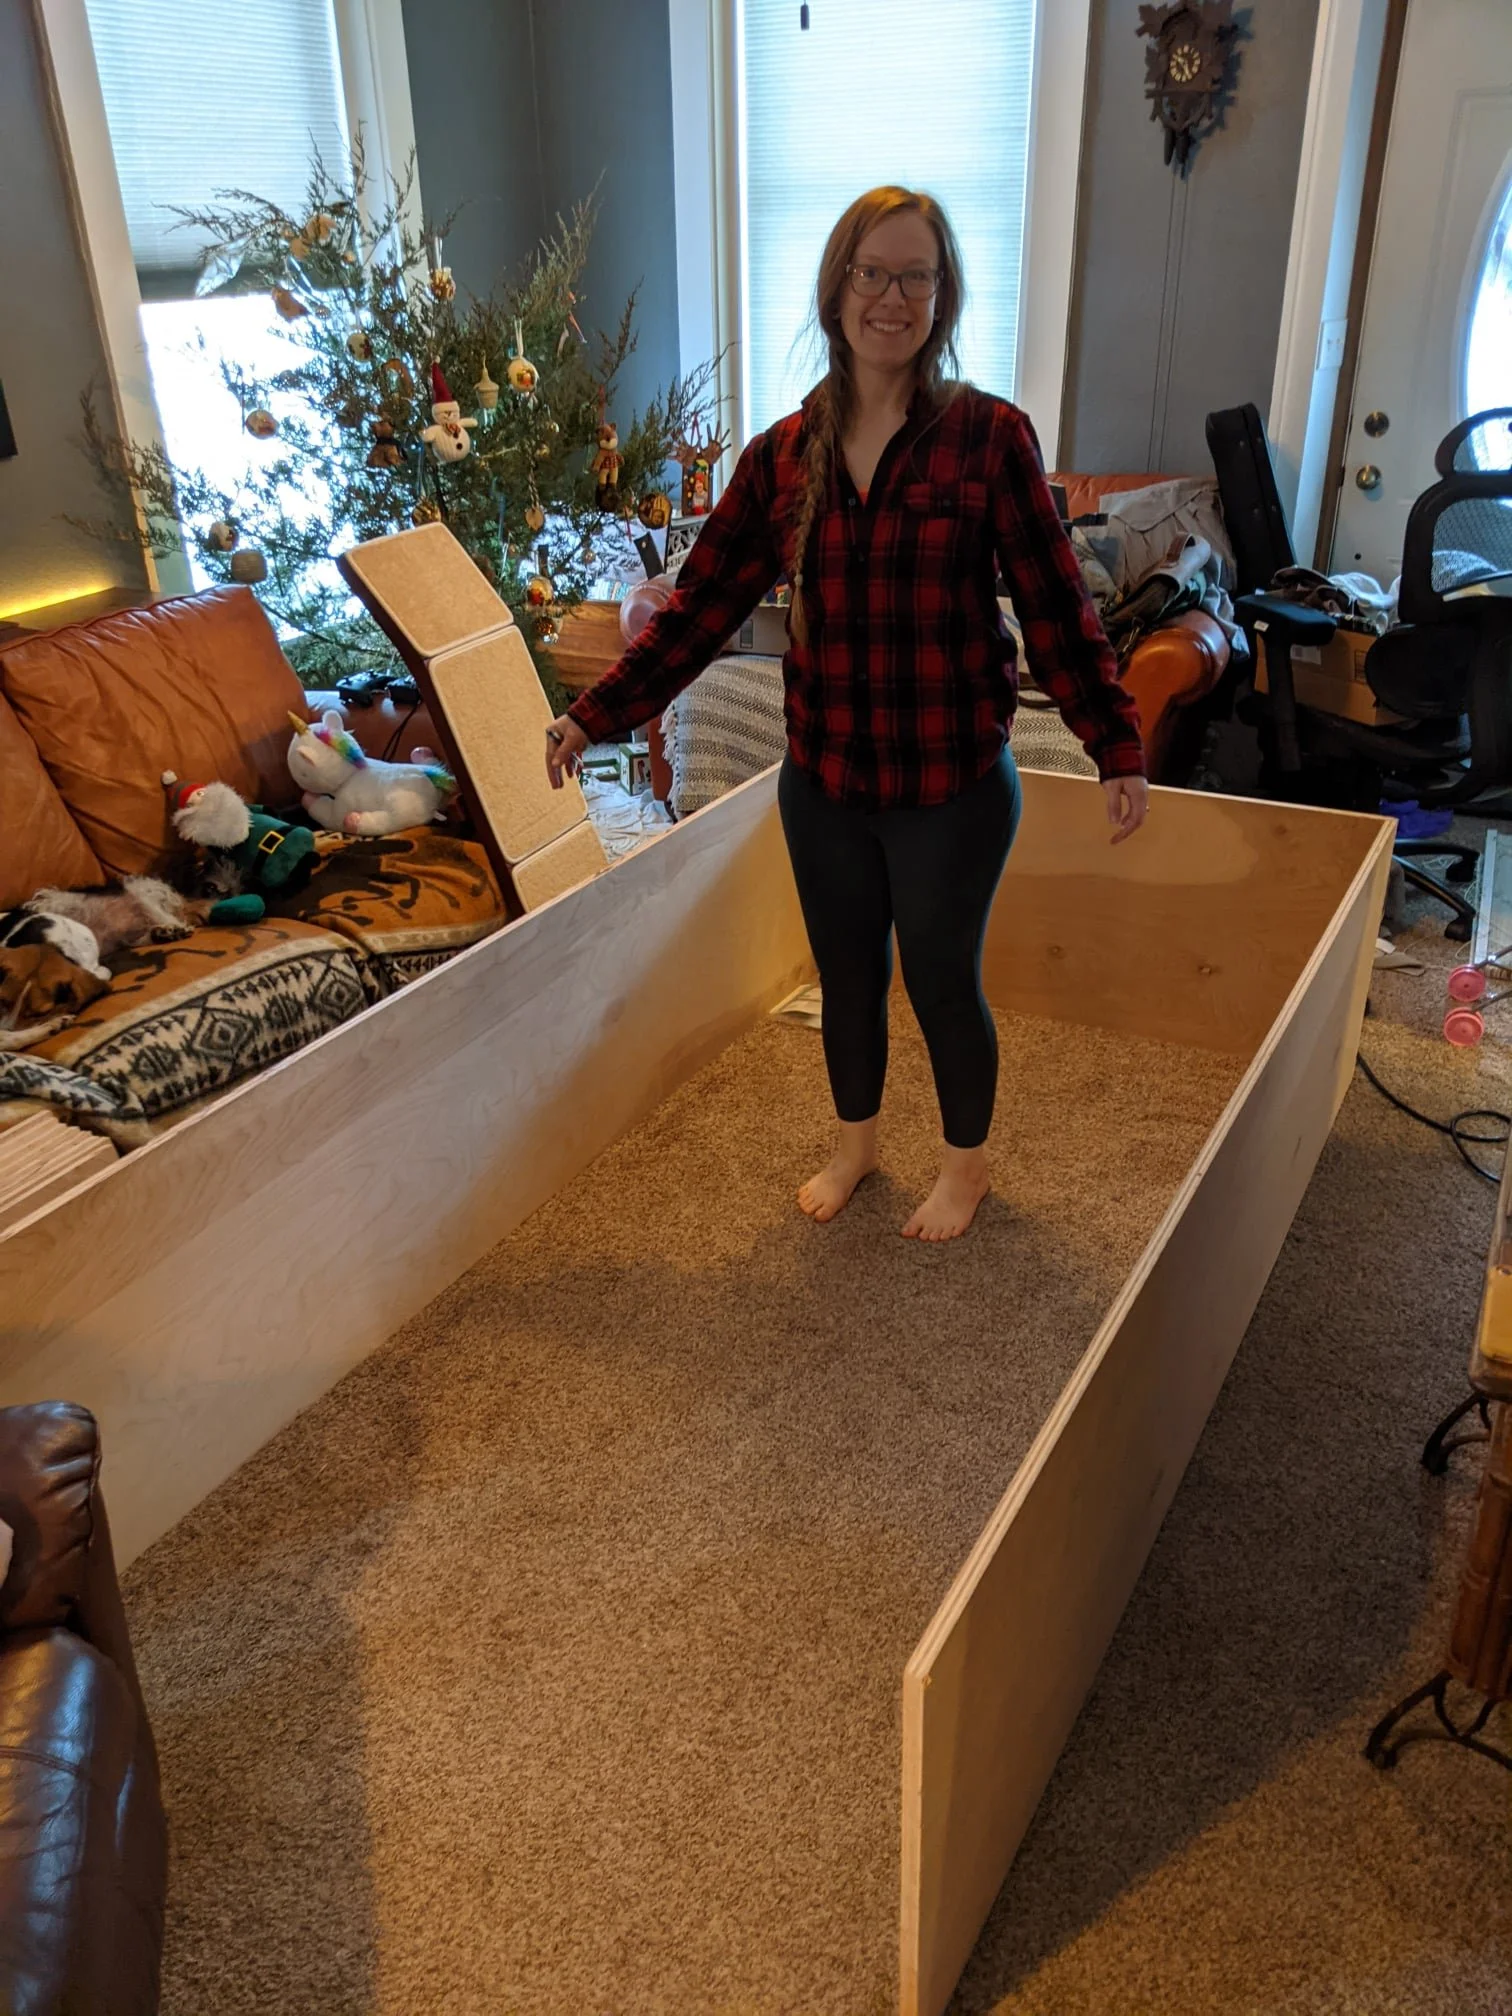
After the demolition was completed we could start the main build. Thankfully, our living room was just large enough to build the frame laying down. It was a bit too cold to do the construction outside and it was going to be much easier to maneuver into place from just one room over.
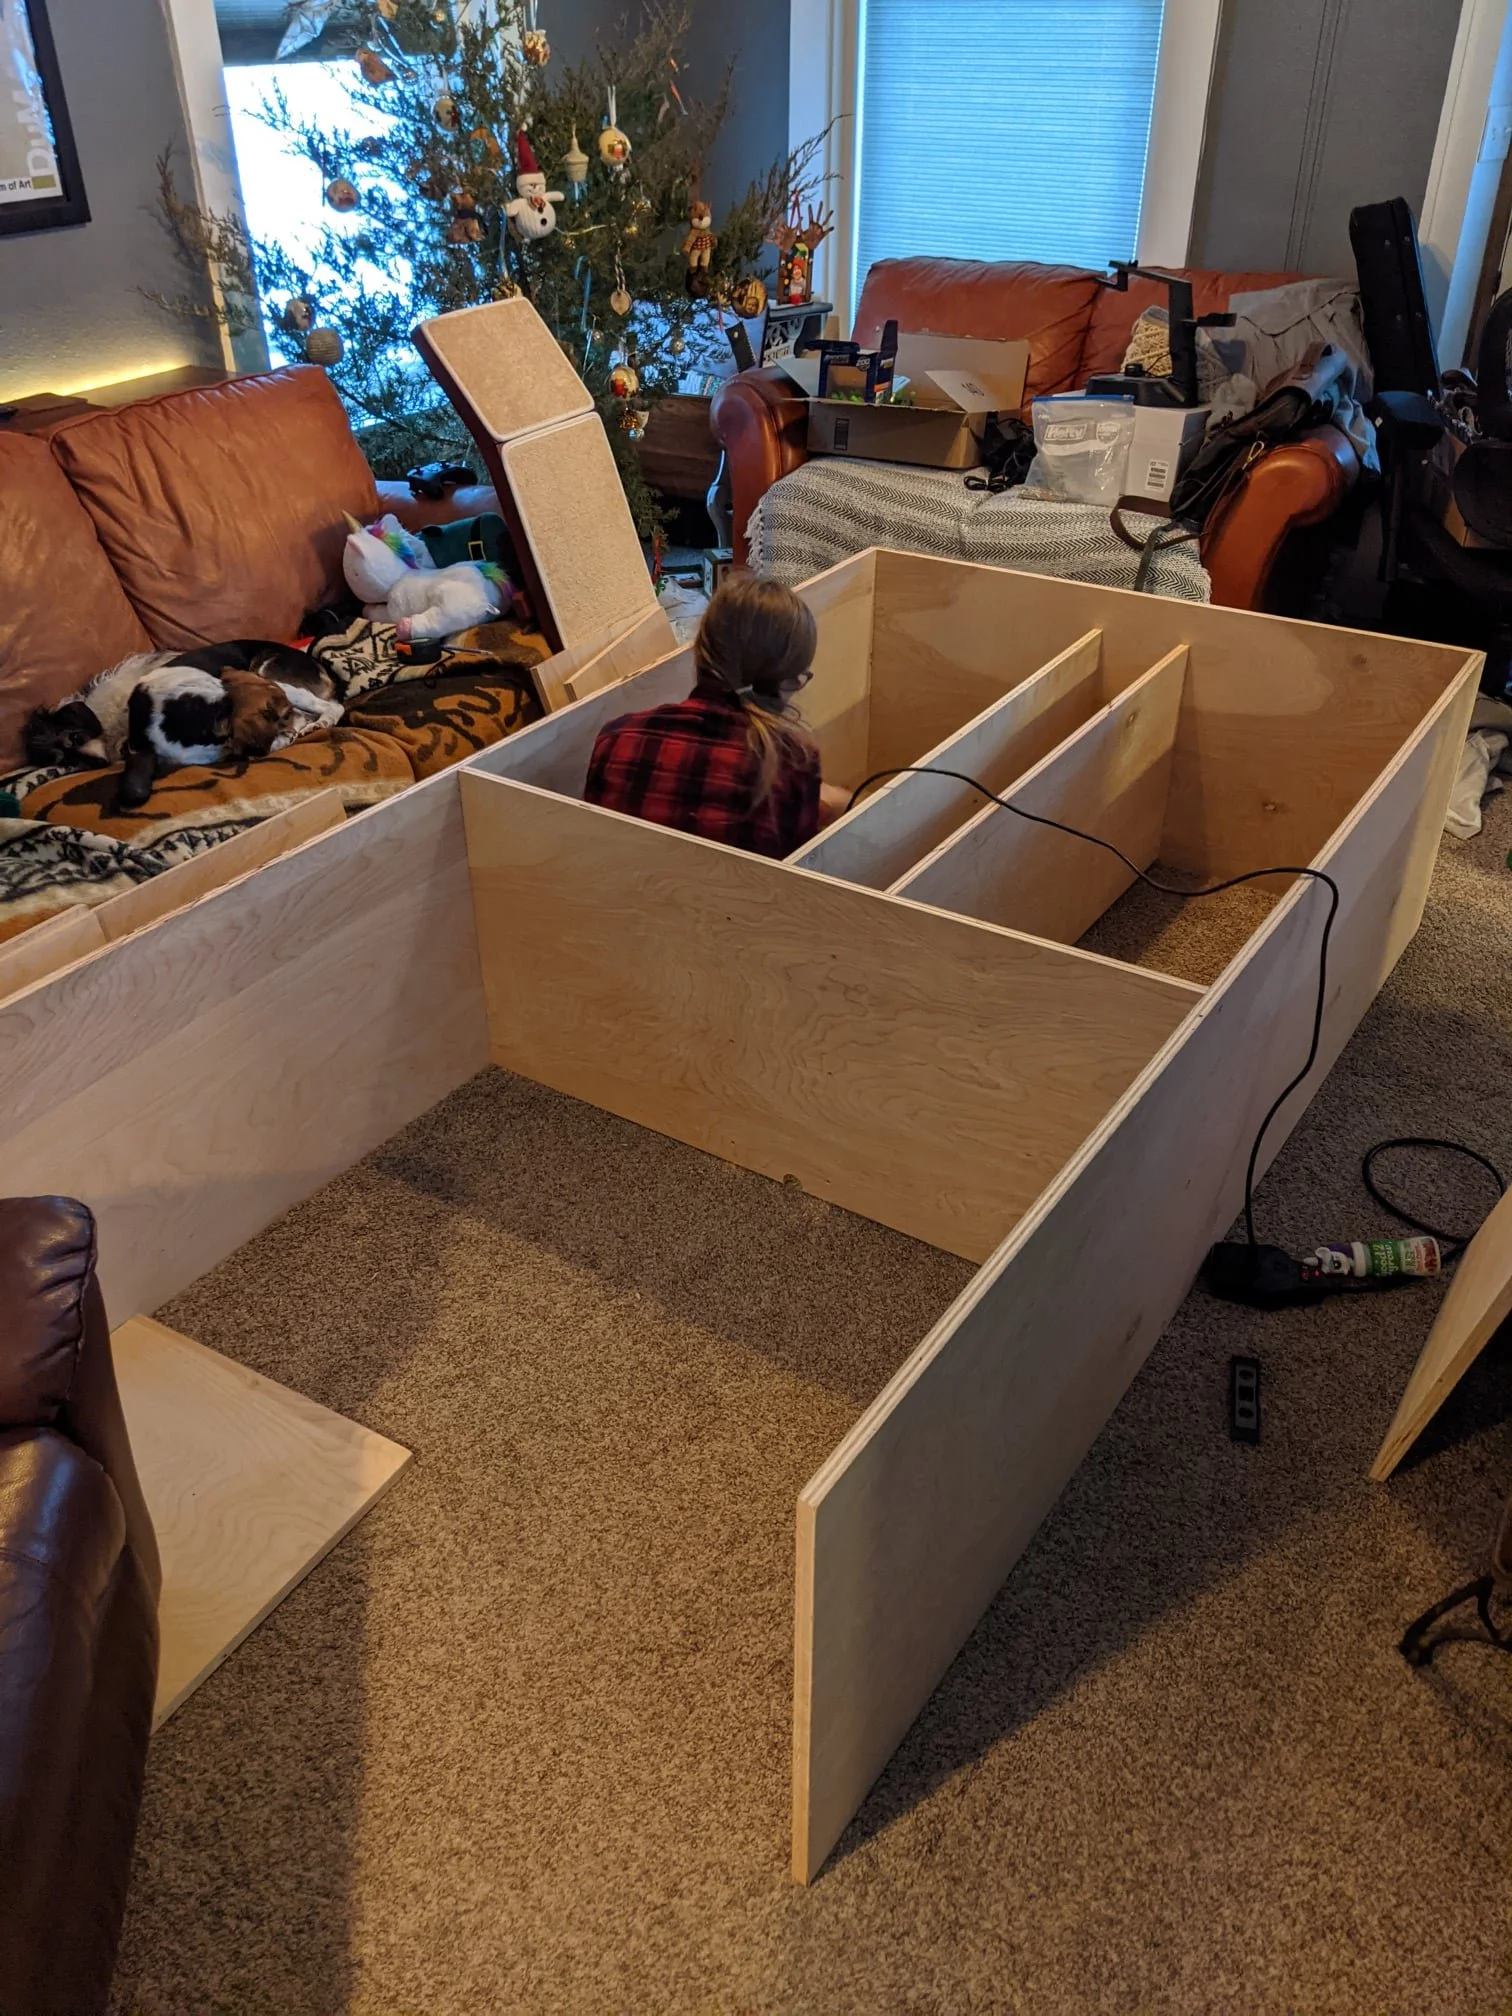
Thankfully we remembered to install some screw mounts inside that narrow central space (you will see how those are used later). It would have been nearly impossible to do later after everything was assembled.
It was definitely a challenge to move this thing around, but we managed. It was at this point we realized that we would need a brace between the two “legs” to add more stability.

You can see the brace installed at the bottom of this picture with the whole thing sitting in the final location. On the back wall you can also see where we had to repair the wall plaster. Whoever built the old closet had glued it in place and removing it caused large chunks of the plaster and lathe walls to come with it. Due to the age of the house we had to do a bit of research on how to fix all that.

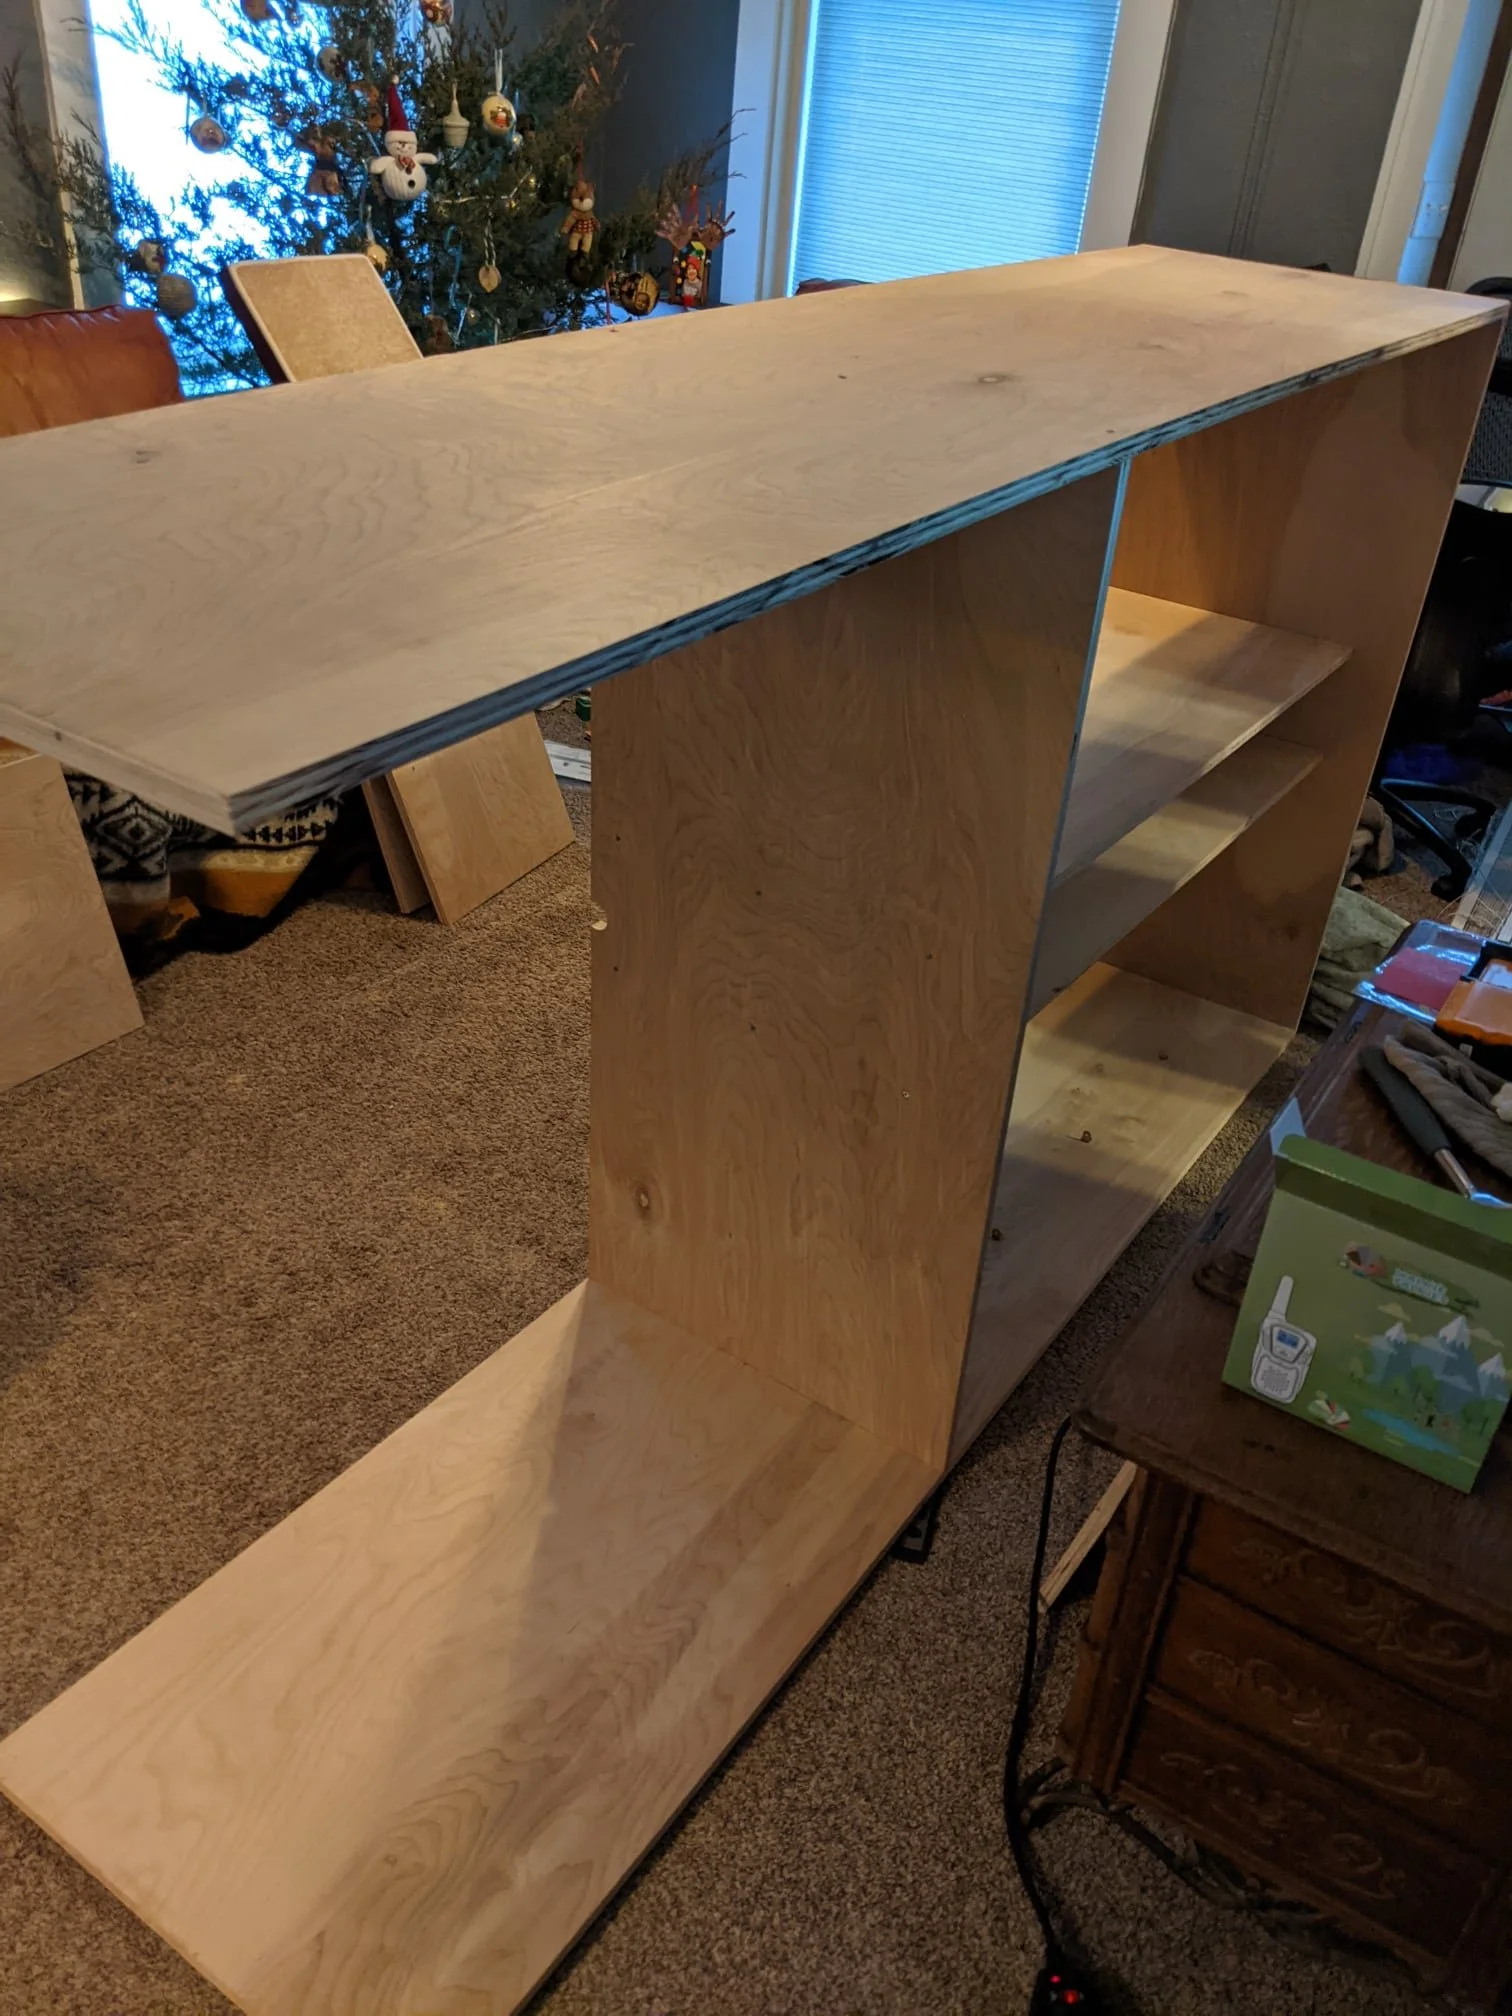
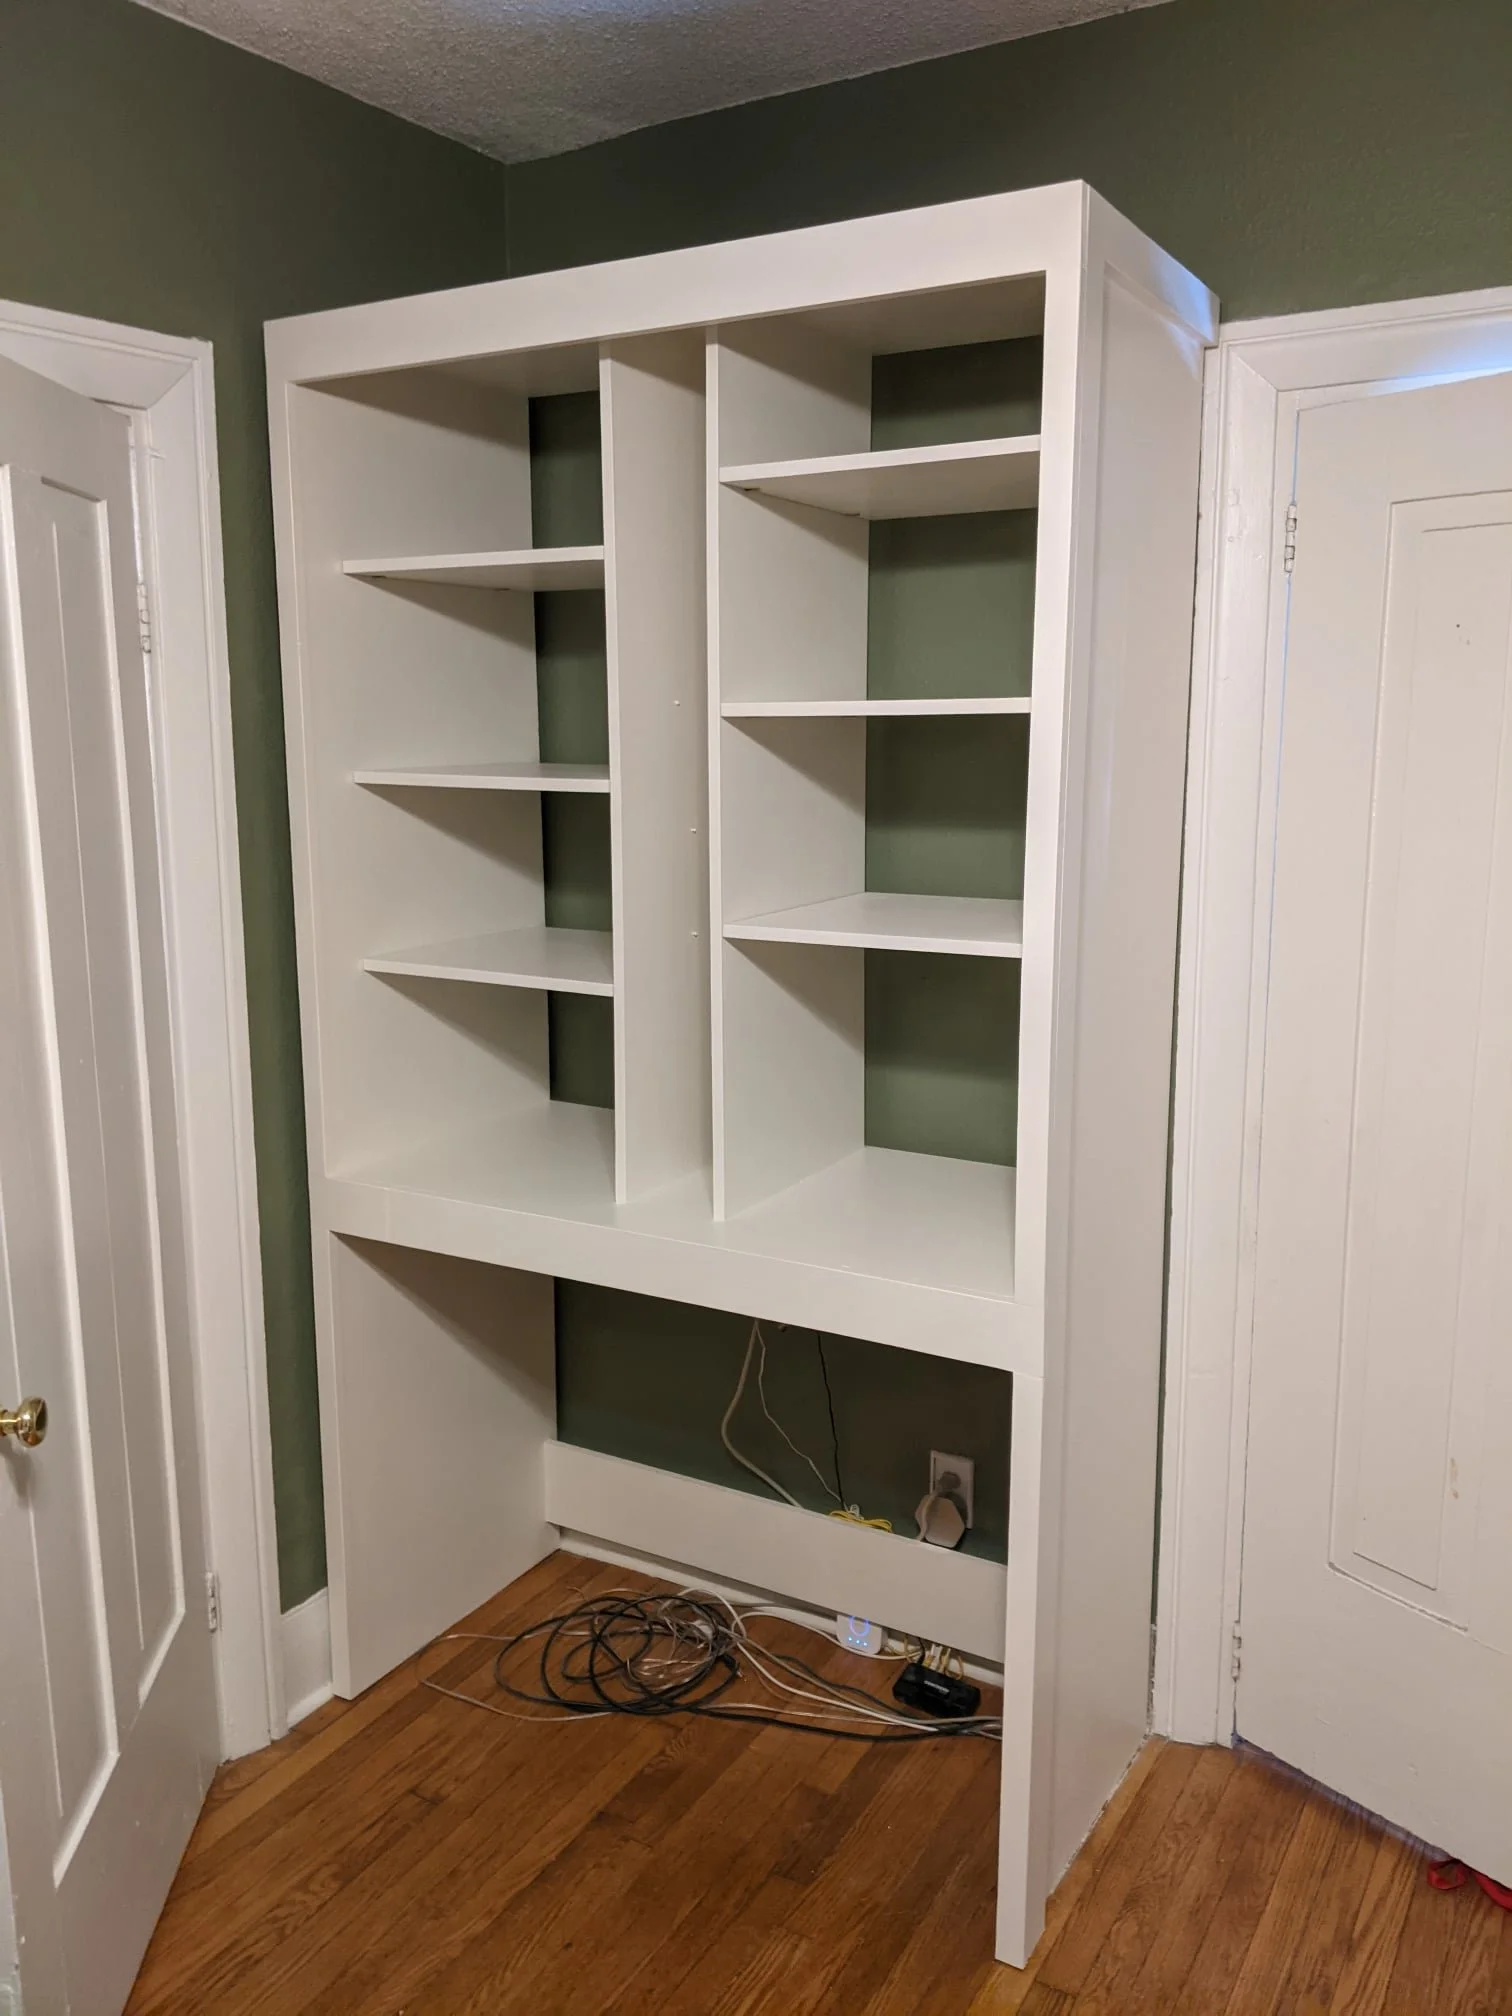
Here we got our shelves in place and added some front framing pieces that would be needed later for the sliding door mounts. The shelves on the right side look a little awkwardly spaced here. That’s because they will house a few gaming consoles standing upright and they needed a bit more room for proper heat ventilation. The left side shelves are the only ones that are regularly visible, so those are more evenly spaced.

After adding some more trim on the sides we got started on painting. You will notice we also painted the back wall. The previous owners left cans of paint behind in the basement, so we didn't even have to try and match the color. Looks pretty good!
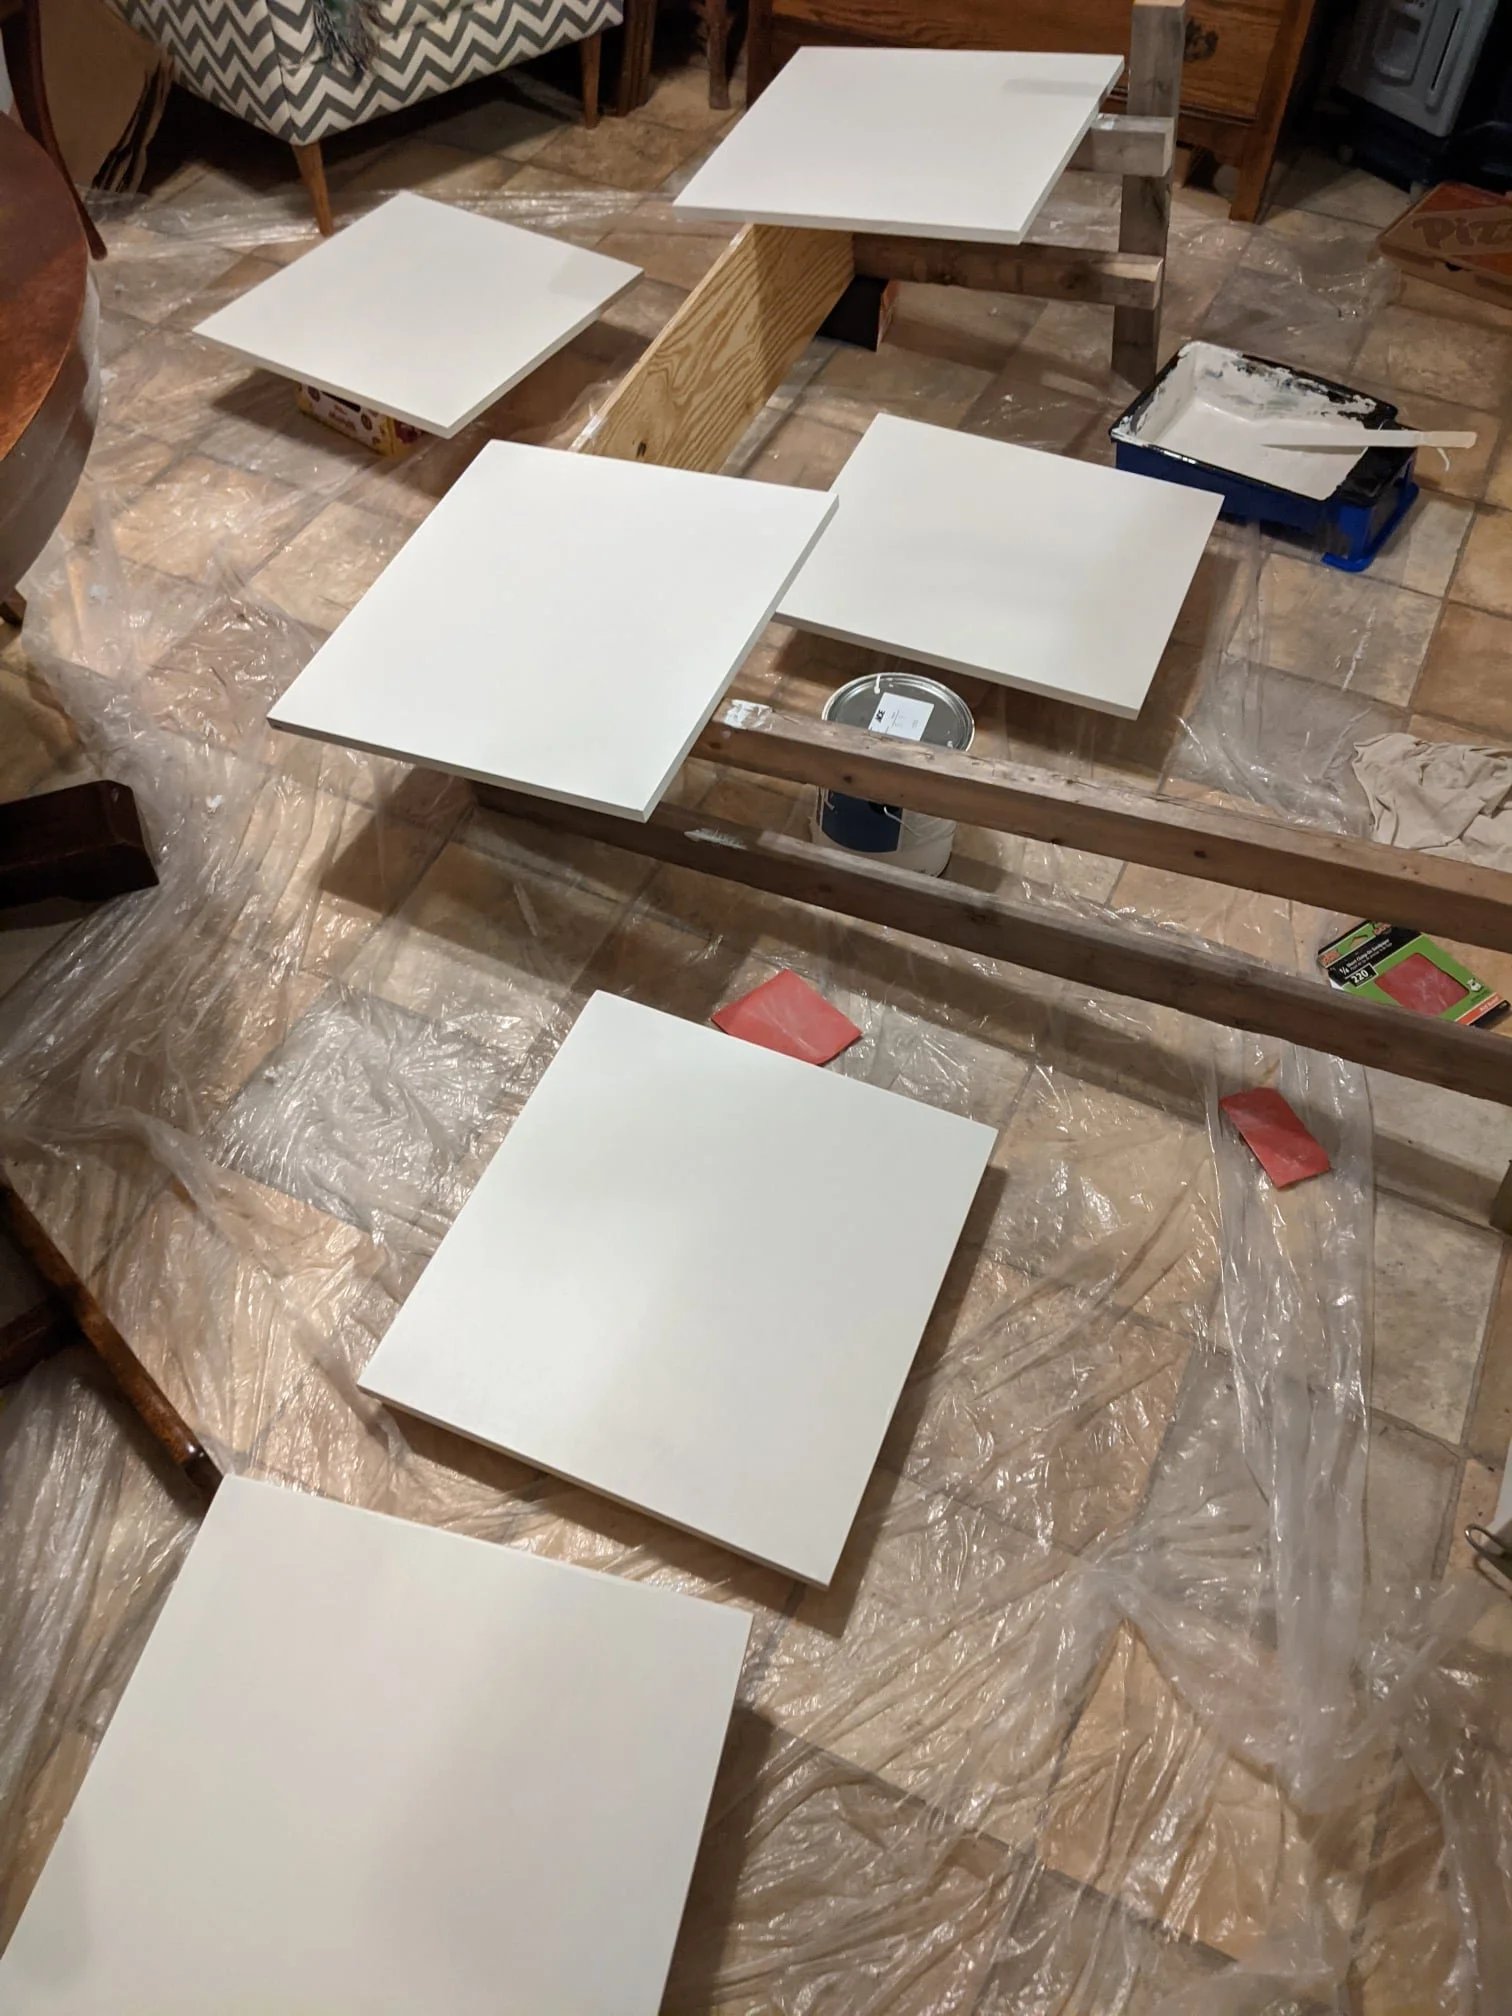
Shelves got a few coats as well.
Hey, that's starting to look like an entertainment center! Next is where my husband’s tech skills were put to use…

This really is the unique feature that made my husband want to build our own unit instead of just buying something. He wanted all the power and internet cables to be hidden in a secret compartment between two shelves. This is where installing those screw mounts previously came in handy. There is very little room to get any tools in here. Just enough space to plug things in. All of our wifi and ethernet cables for the entire house are in this space. It also holds the controller for our smart lights and the IR repeater unit so that our remote will still work with all our devices through the wall. So organized!

We did not make the dresser.
This was the moment of truth for all the planning we had done. My husband got to work with cable management and getting everything reconnected to our TV on the other side of the wall.
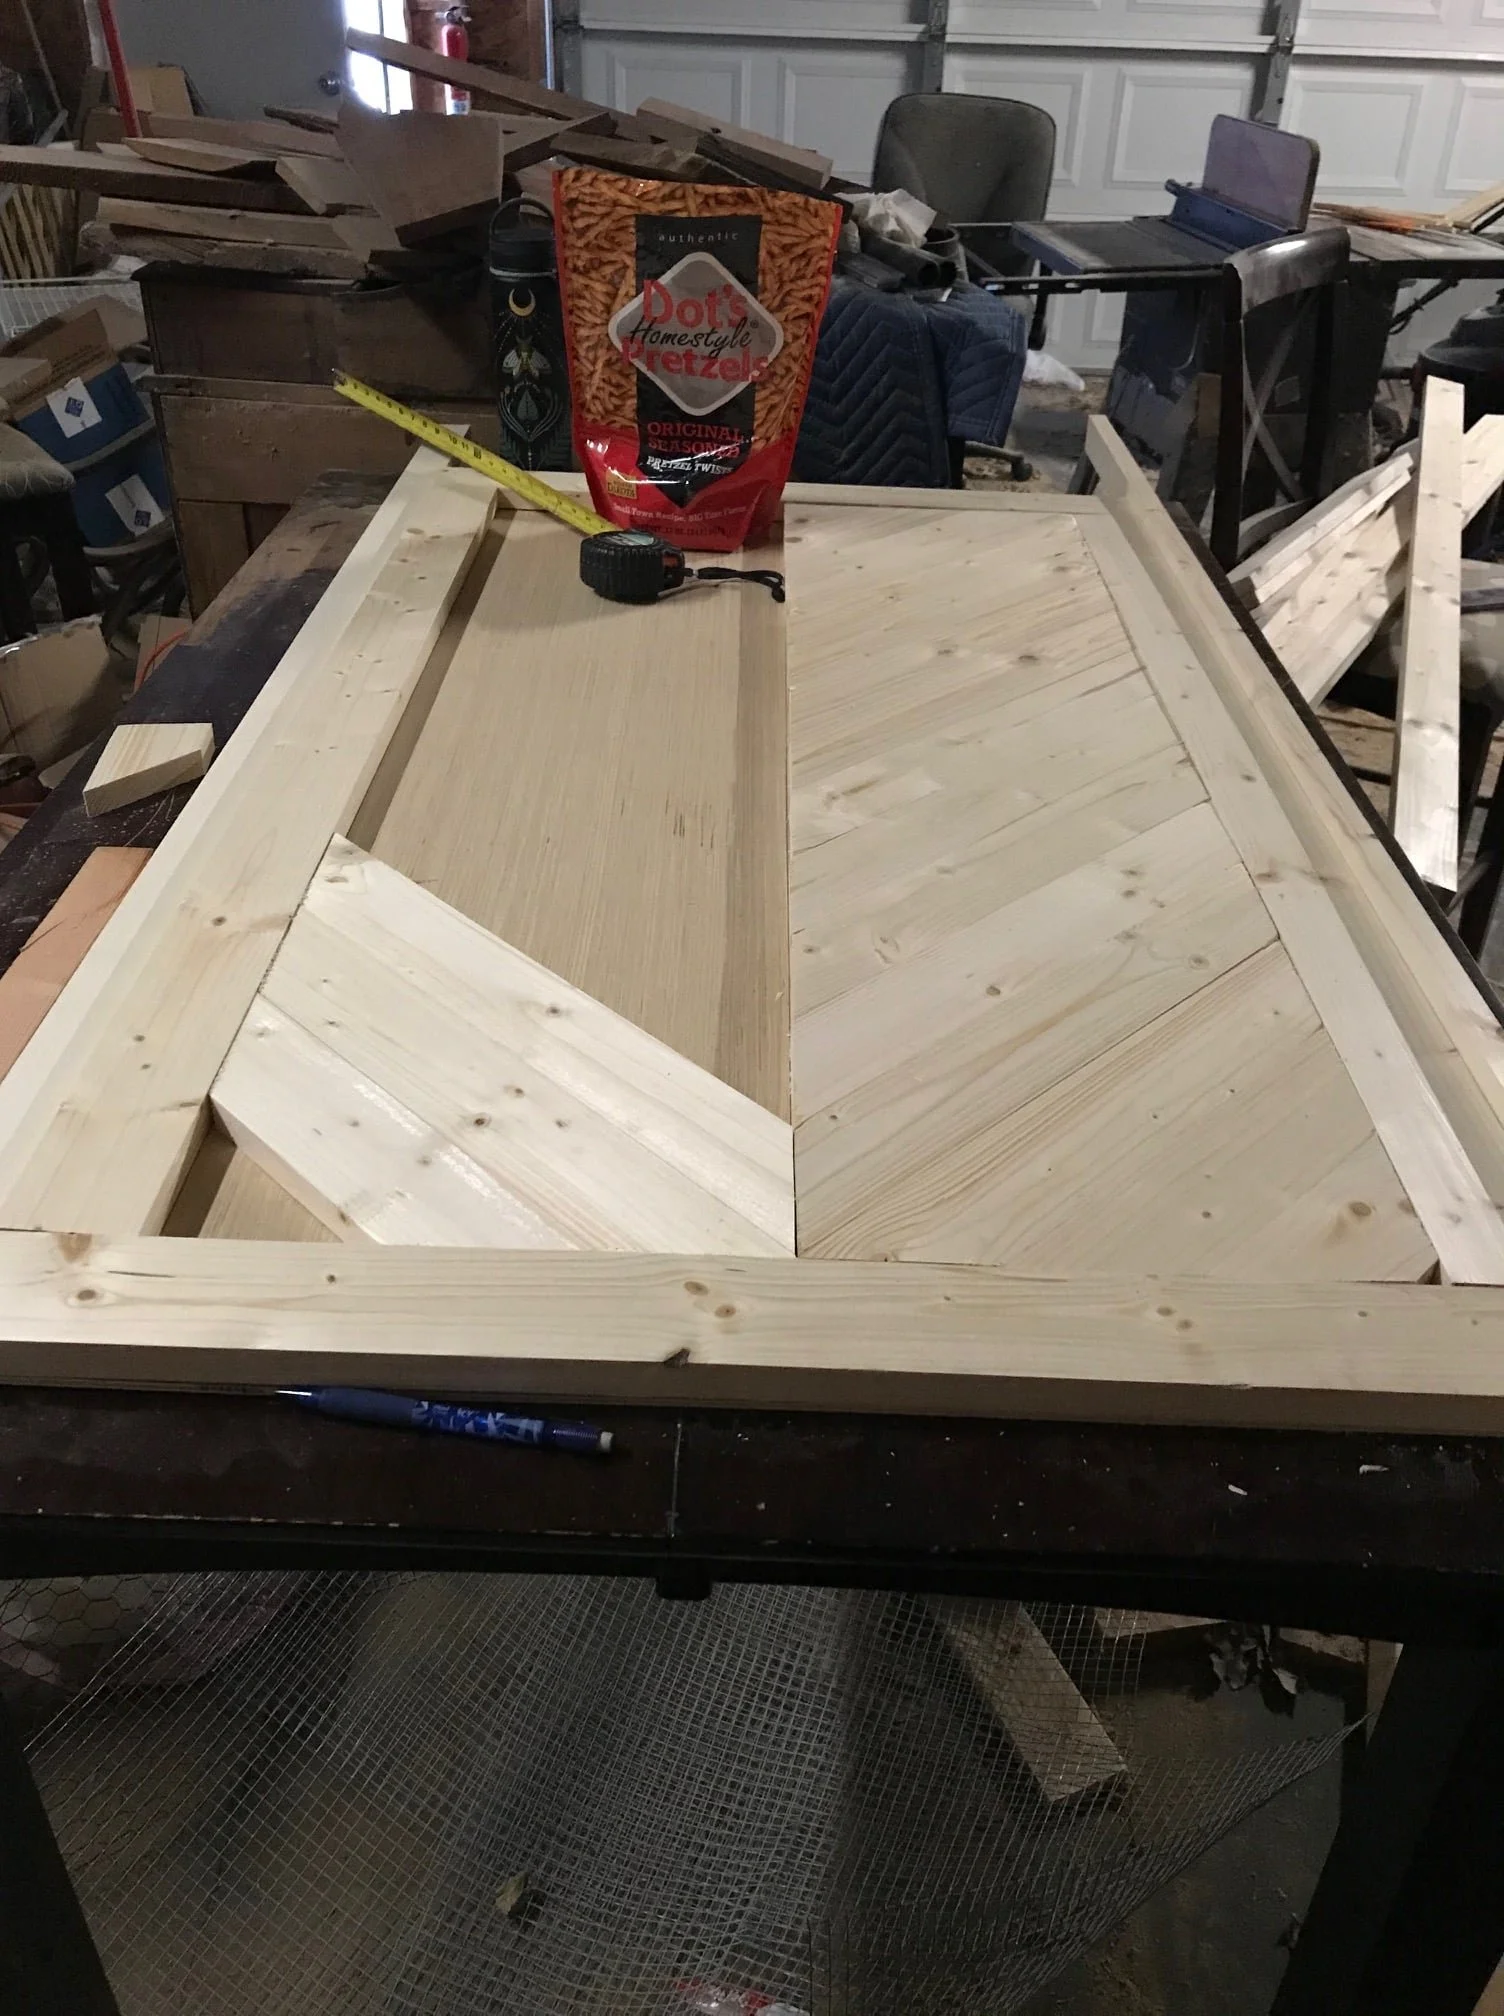
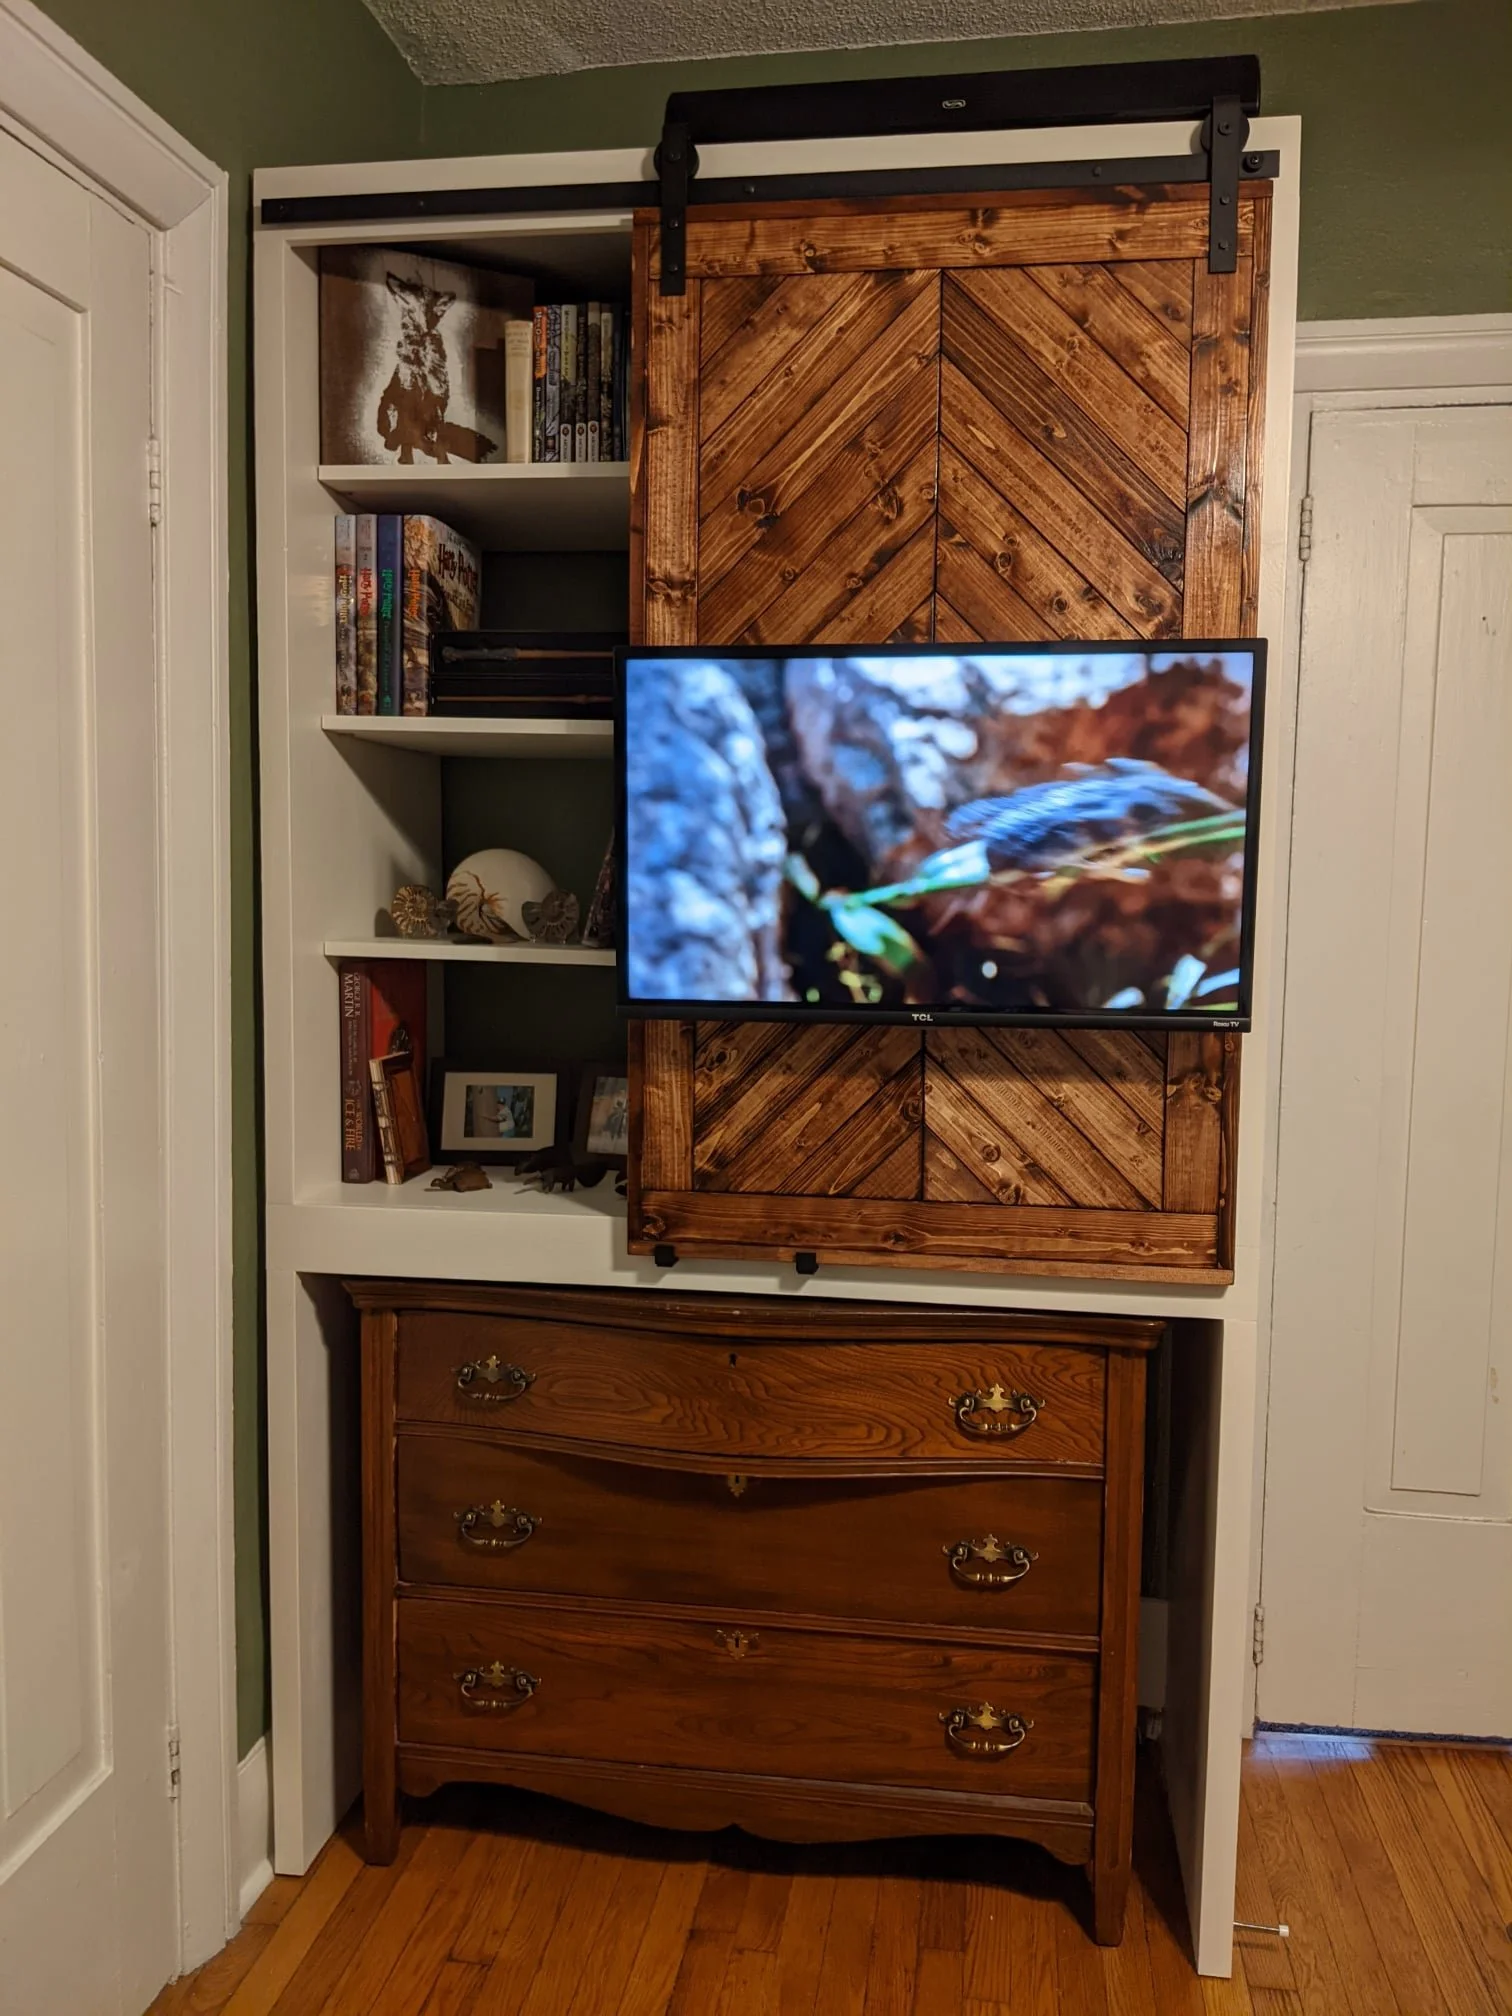
While he worked with the electronics, I was busy on the accent piece for the whole design. This patterned wooden hanging door would hide all the shelves with the electronics and serve as the mount for the bedroom television.
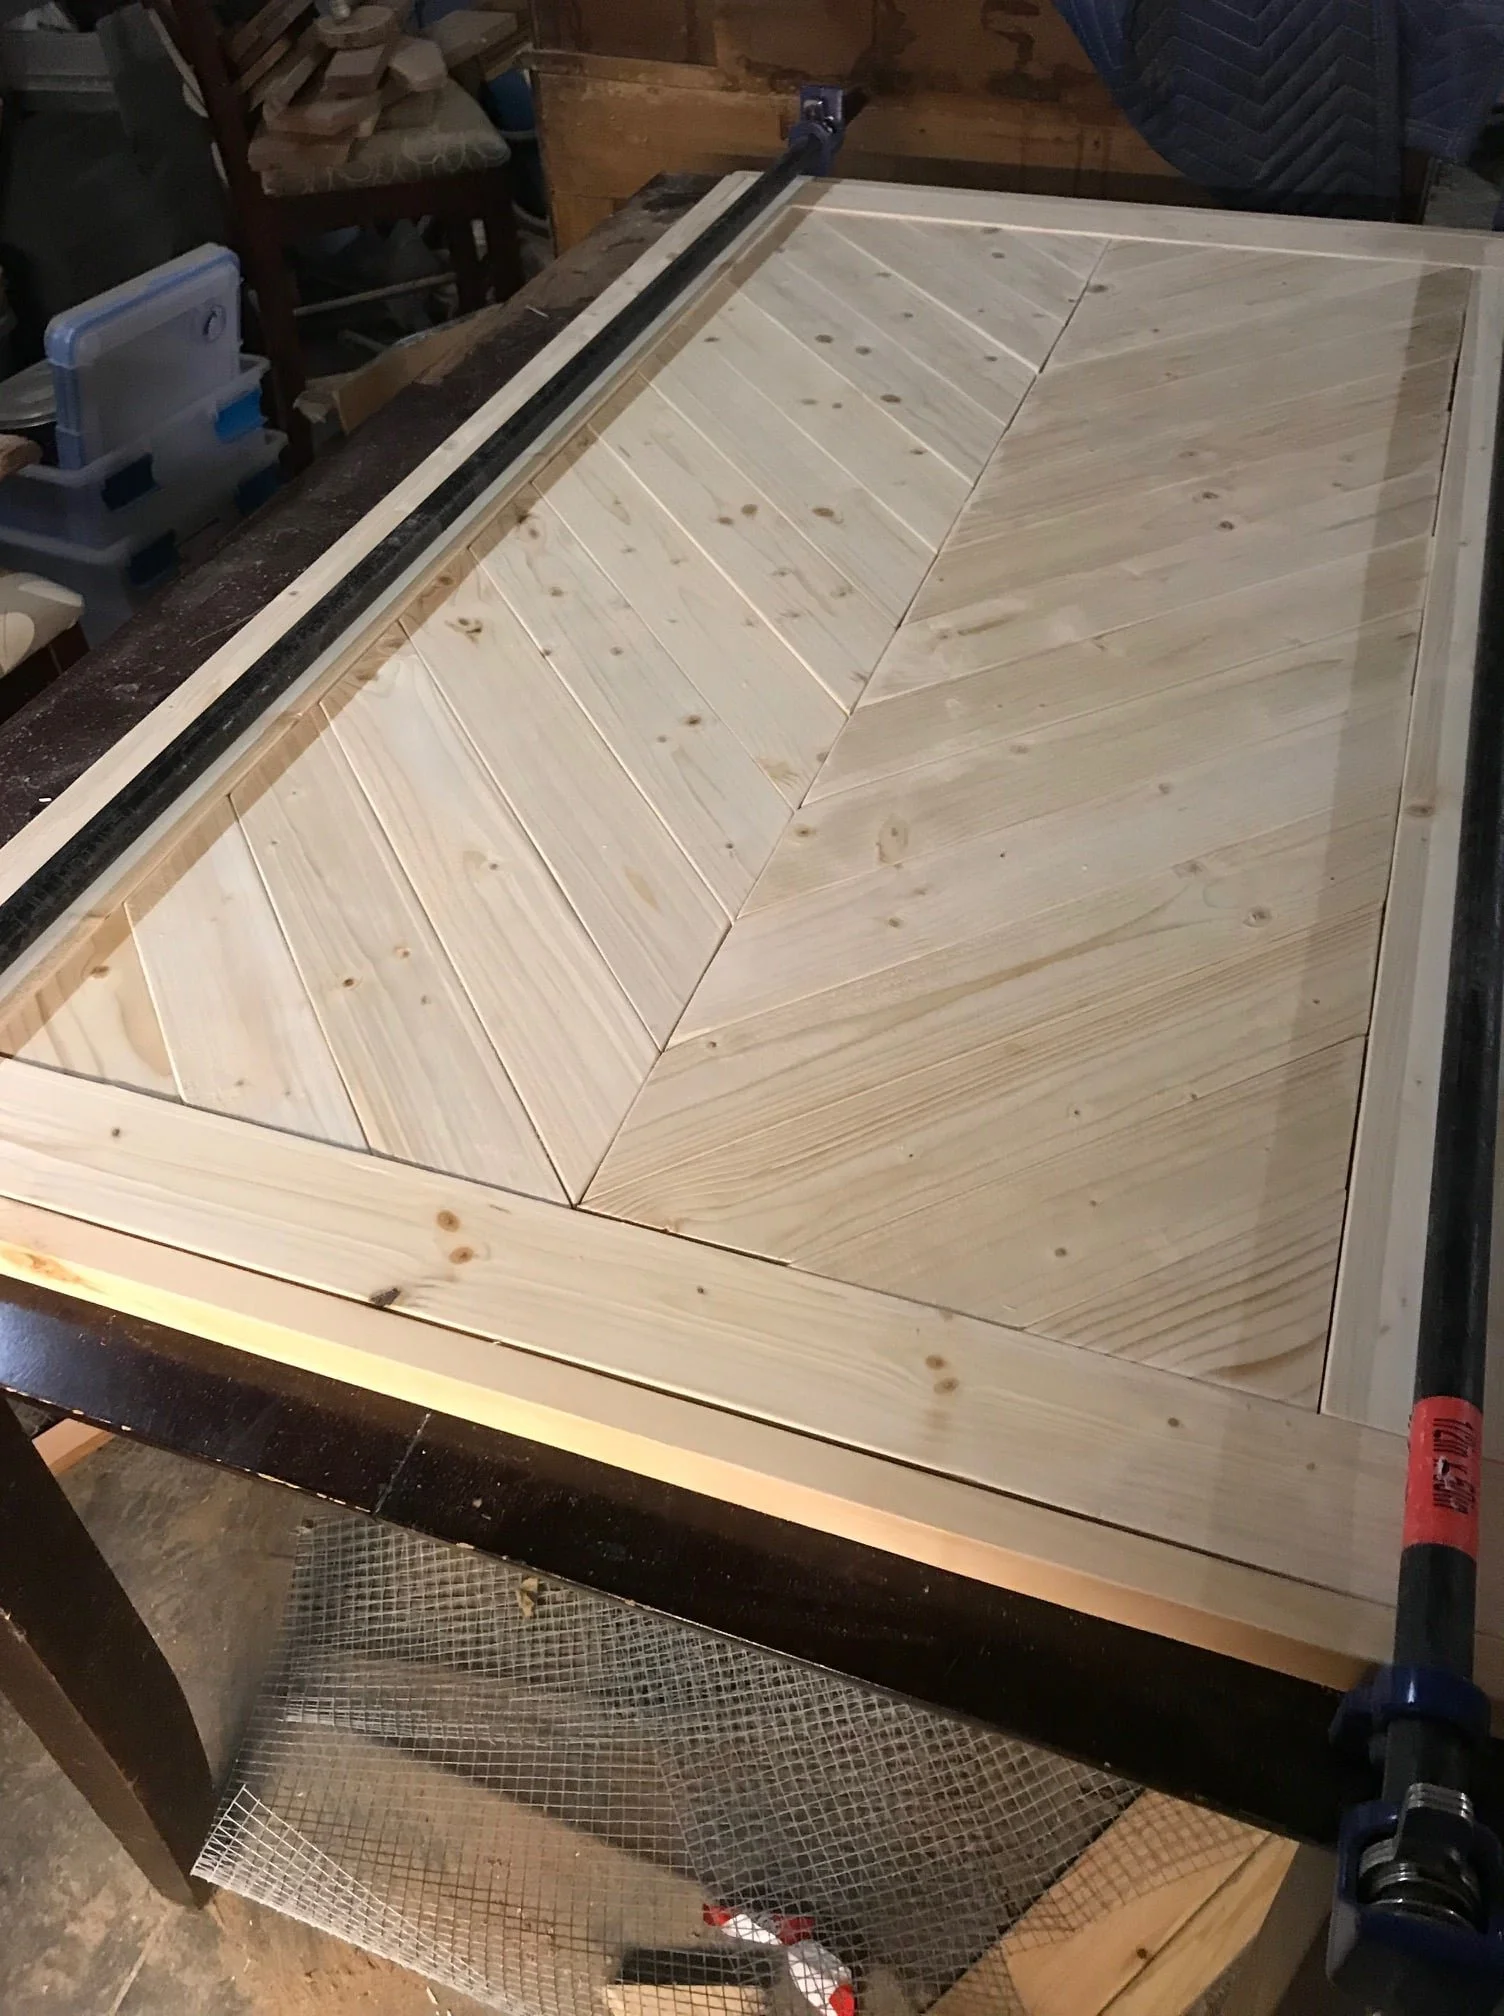
The entire piece is nailed and glued together with a thin plywood backing board to keep everything in place.
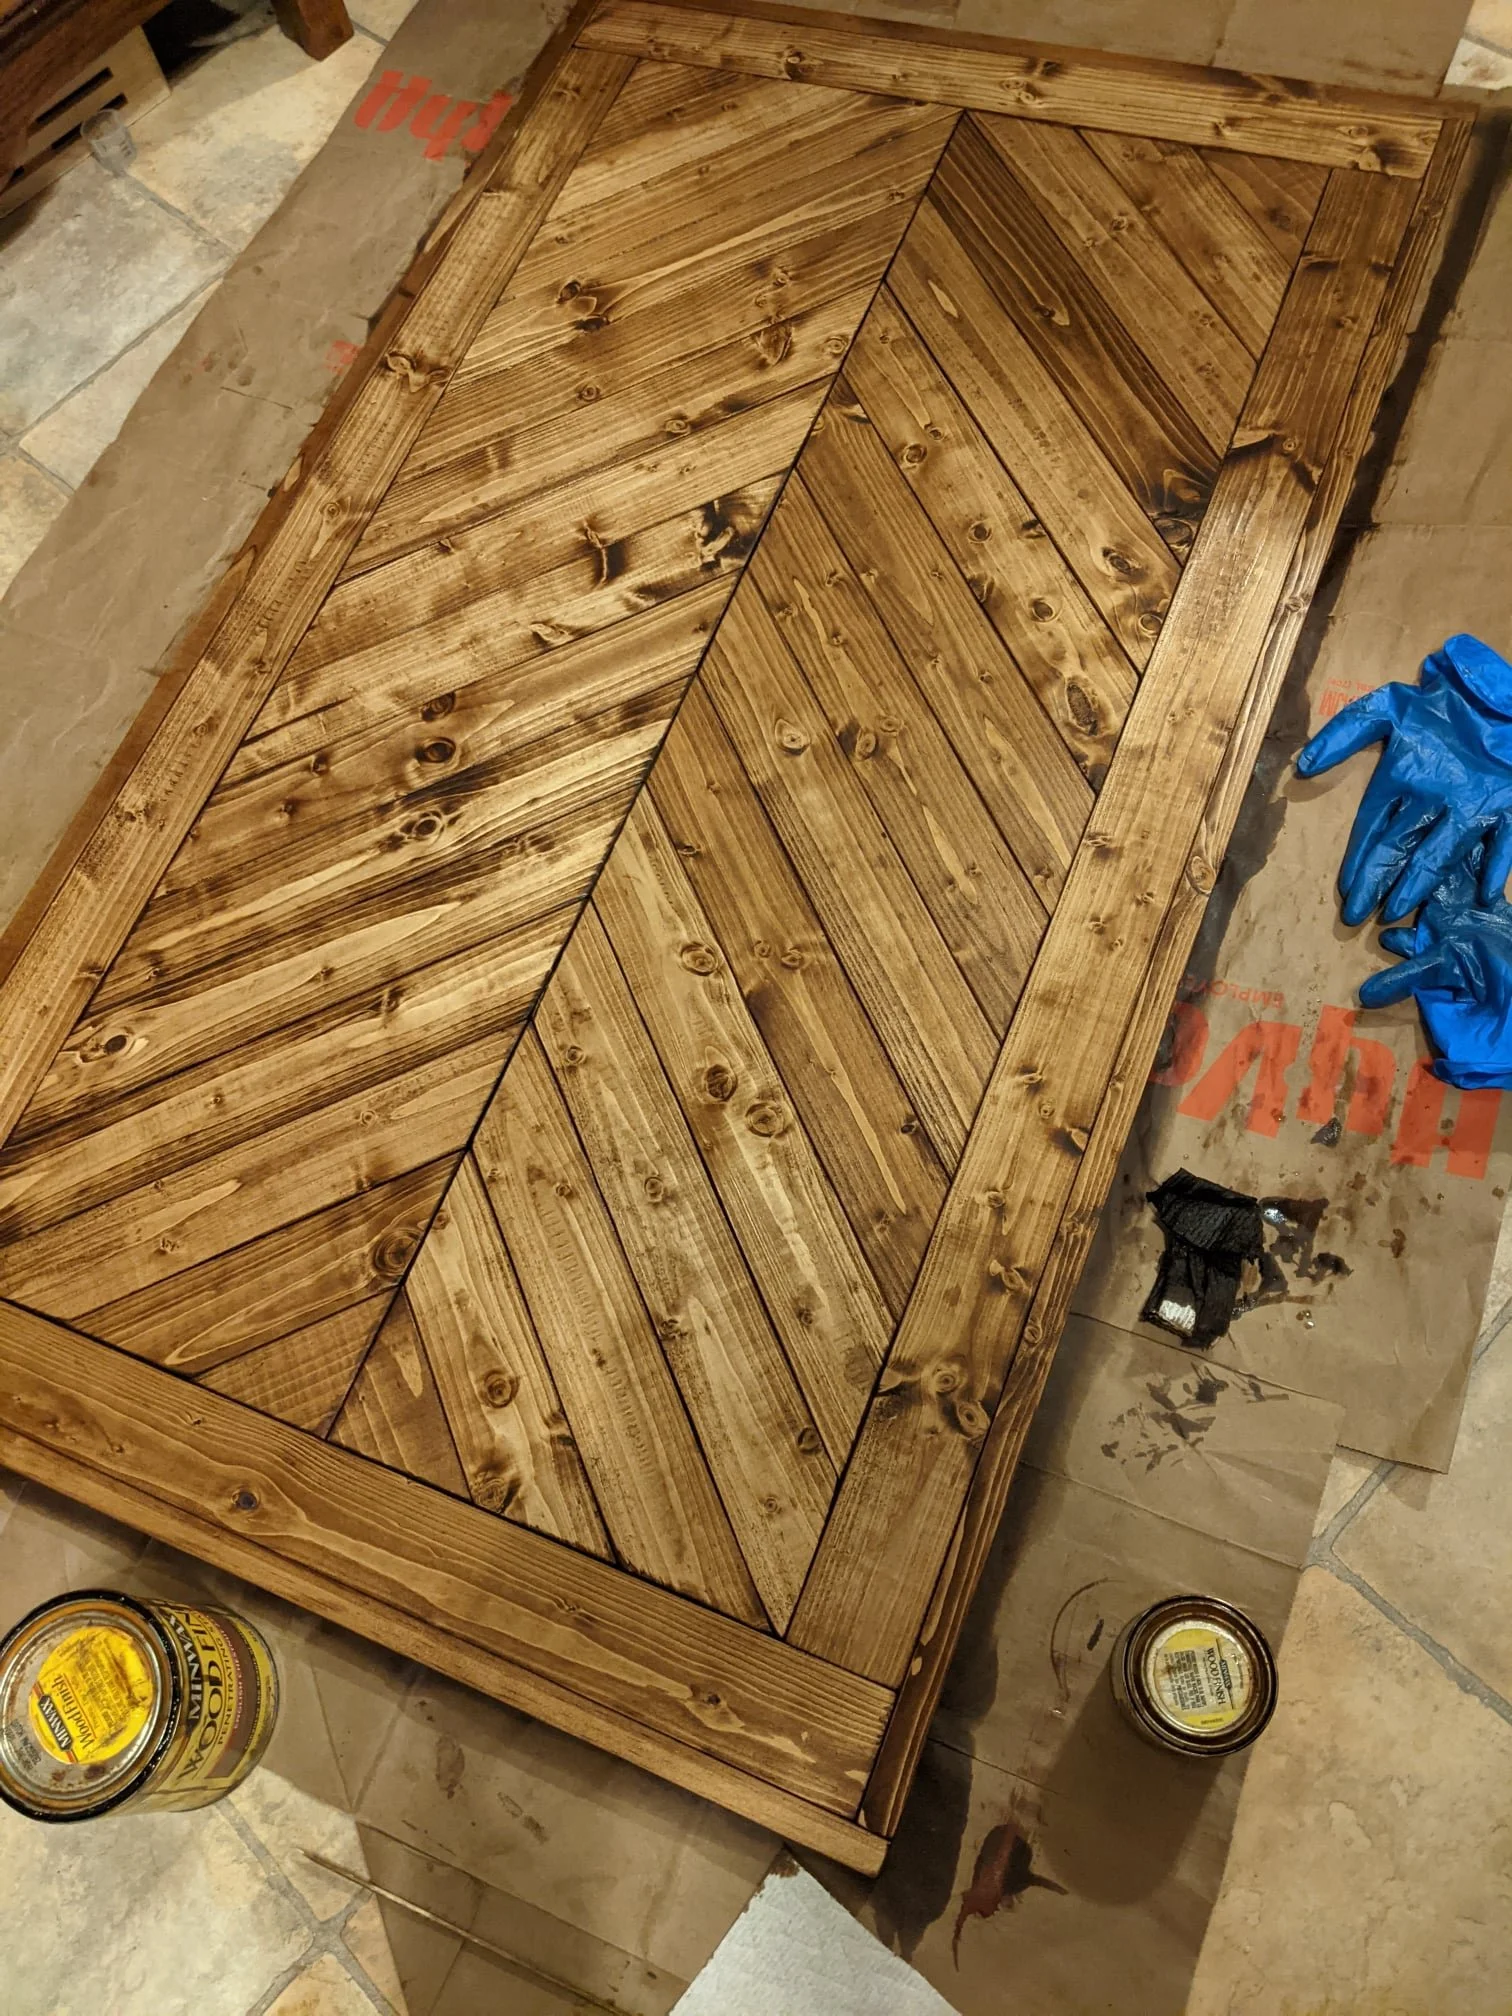
Stain and poly...
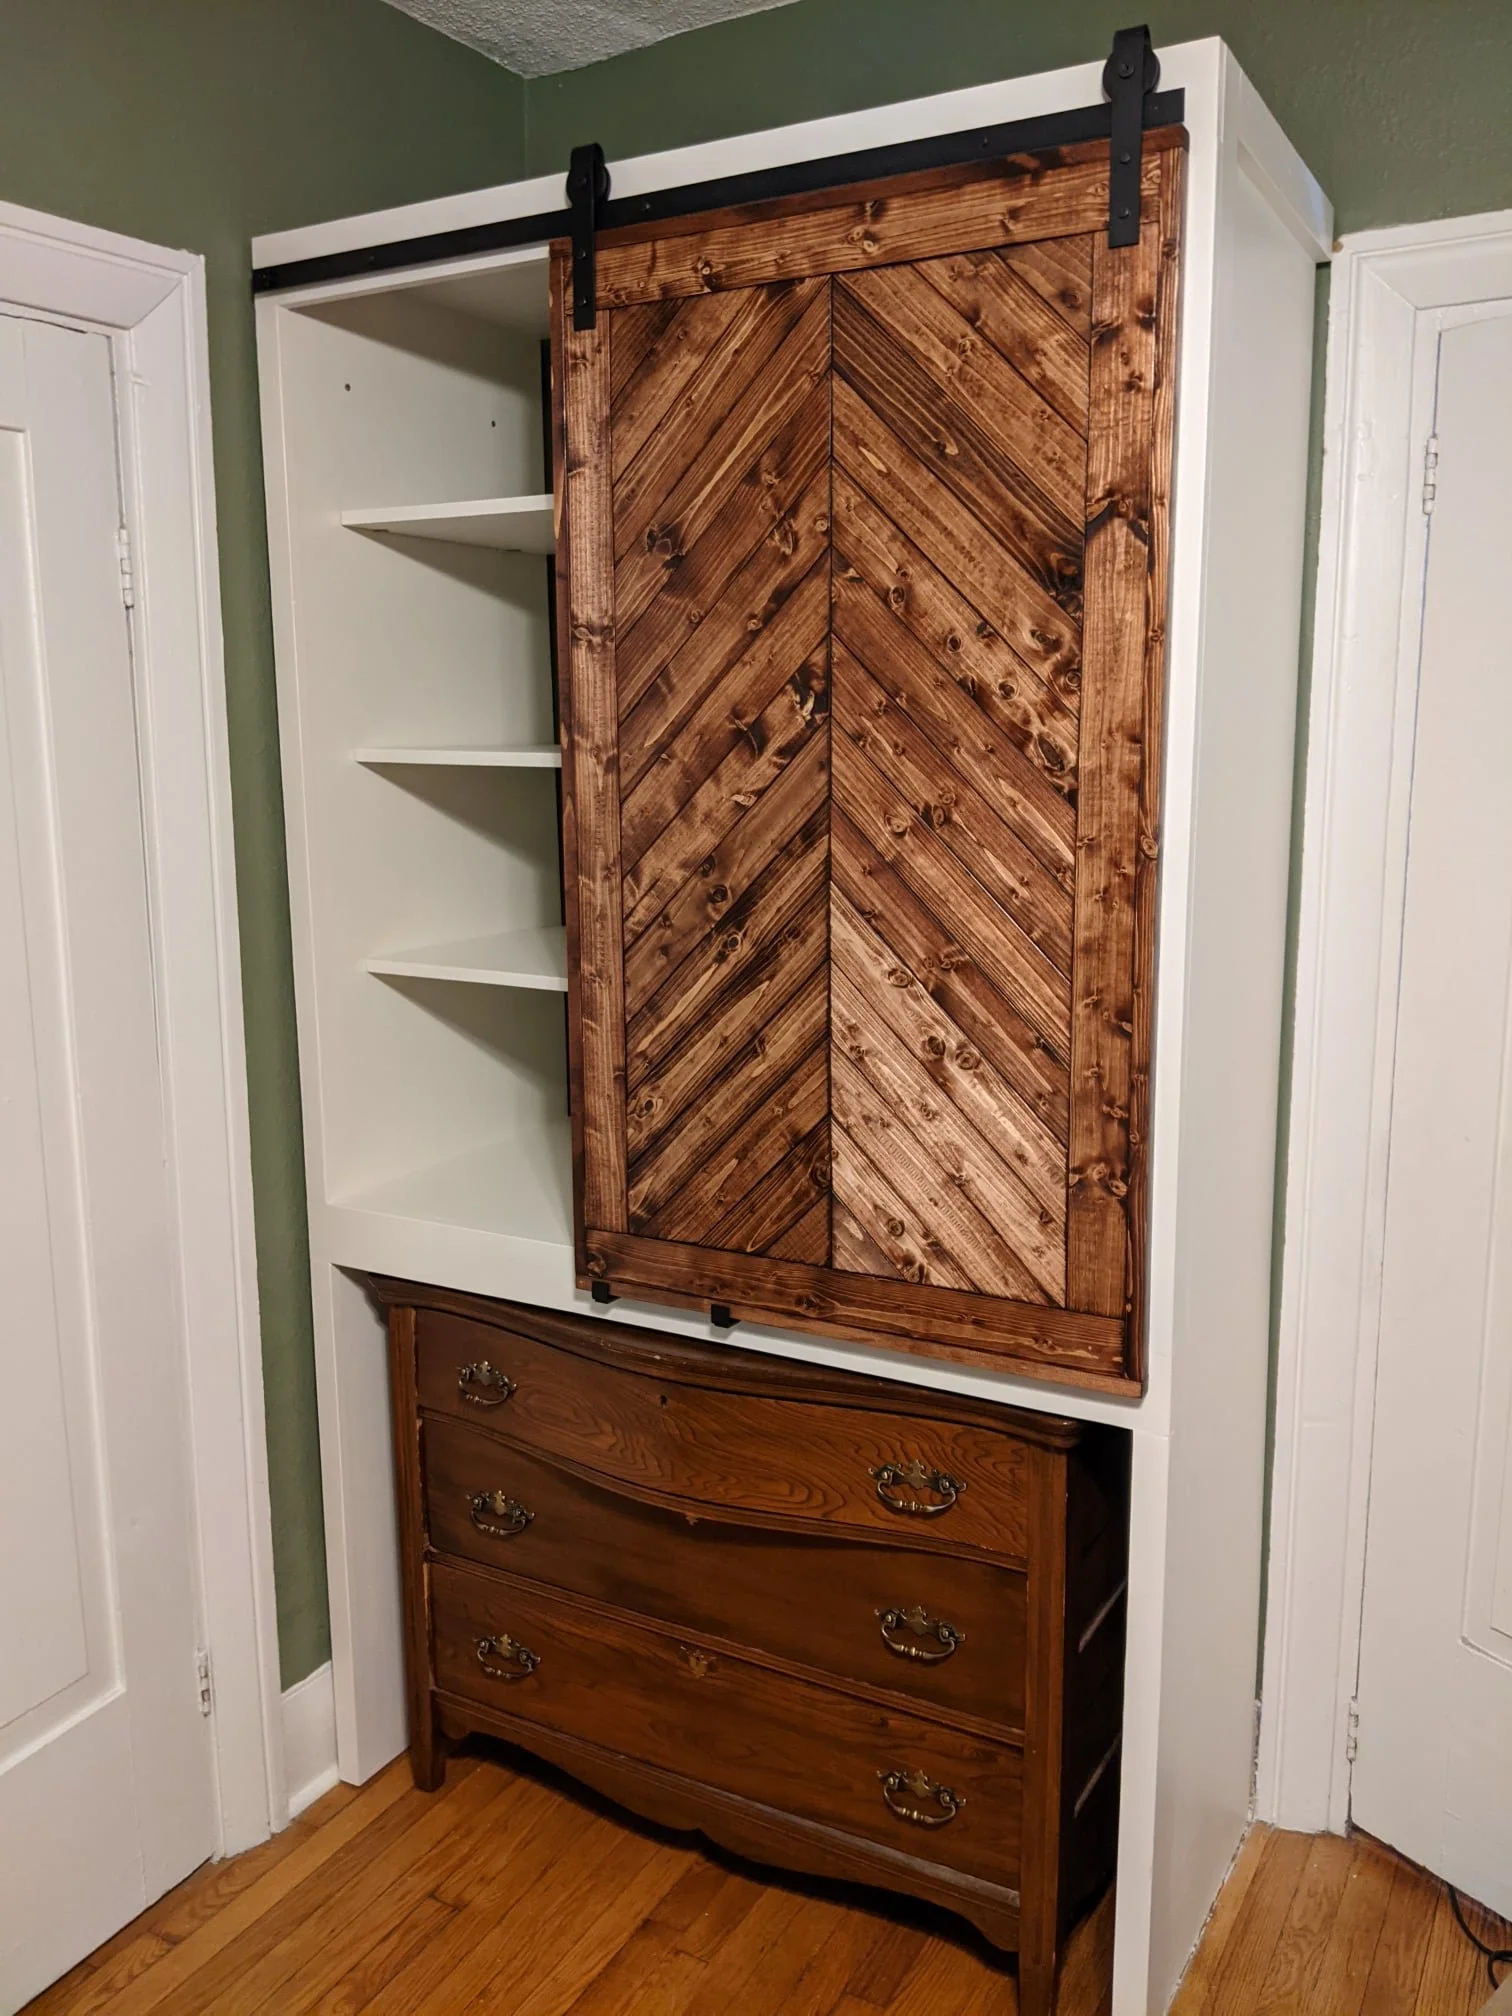
This was probably the hardest part of the entire build. Installing a sliding barn door rail is quite difficult. There are a lot of moving pieces and if you don't get it just right then the door doesn't look straight. We thought for a long time that we measured something wrong, because the door was askew by about a half an inch. Turns out that the entertainment center itself was leaning slightly to the right. So to fix that we anchored the whole thing to the left wall with a couple well placed screws. That drew the whole thing back into alignment and would also make sure that it never tips over.
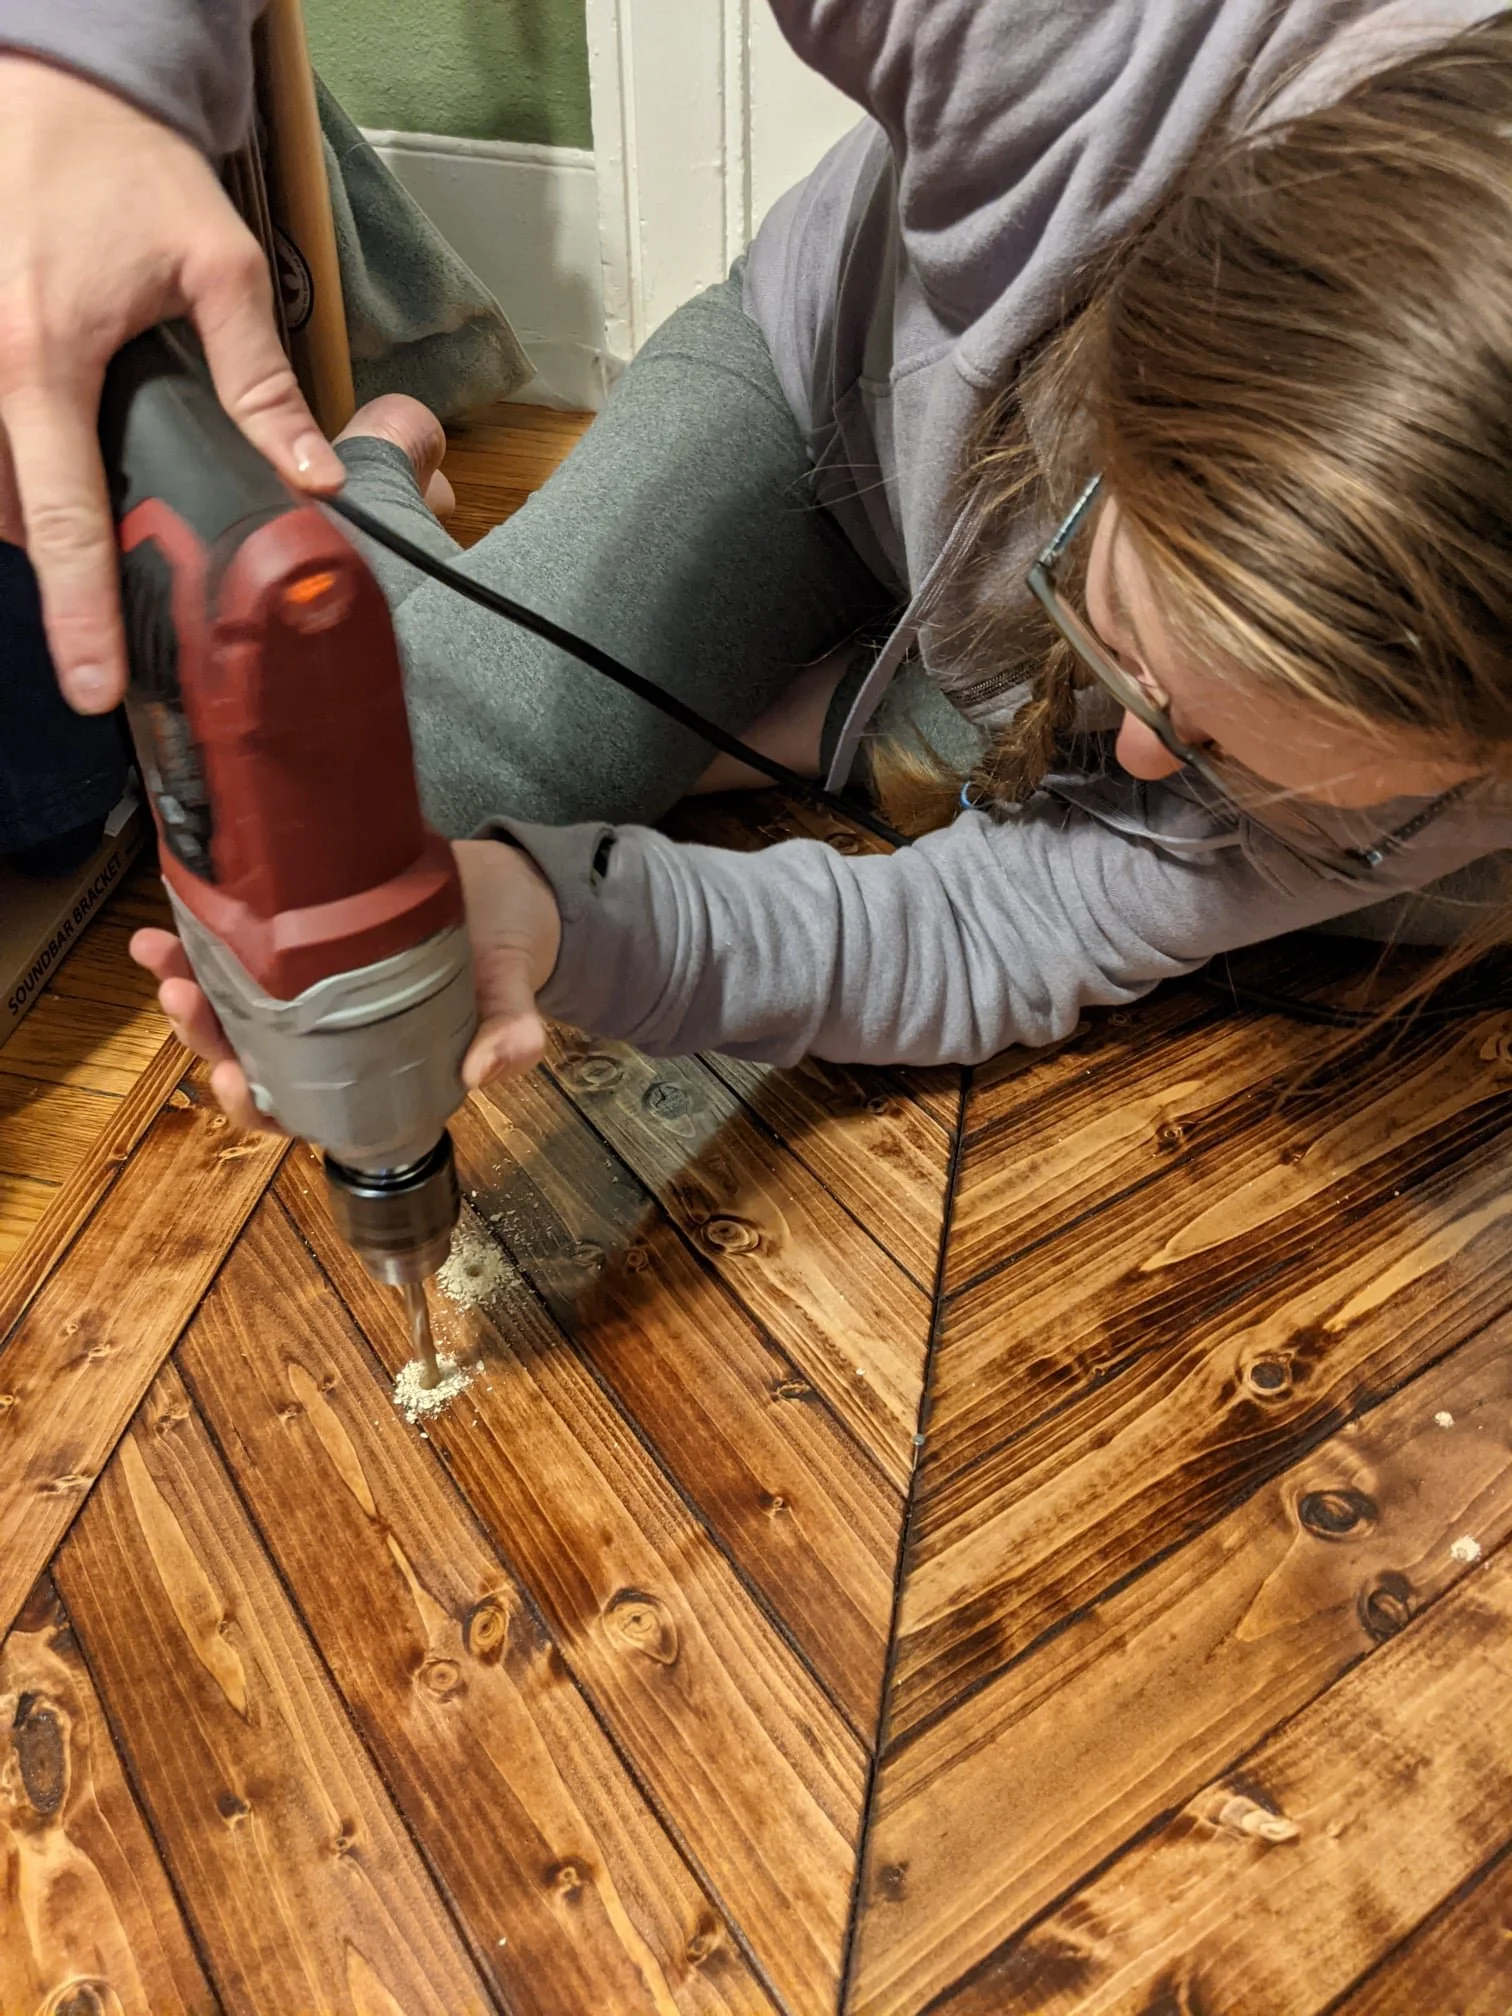
Next came the part that made us both a little bit sad. It was time to drill into the beautiful door, mount the TV, and route the cables.
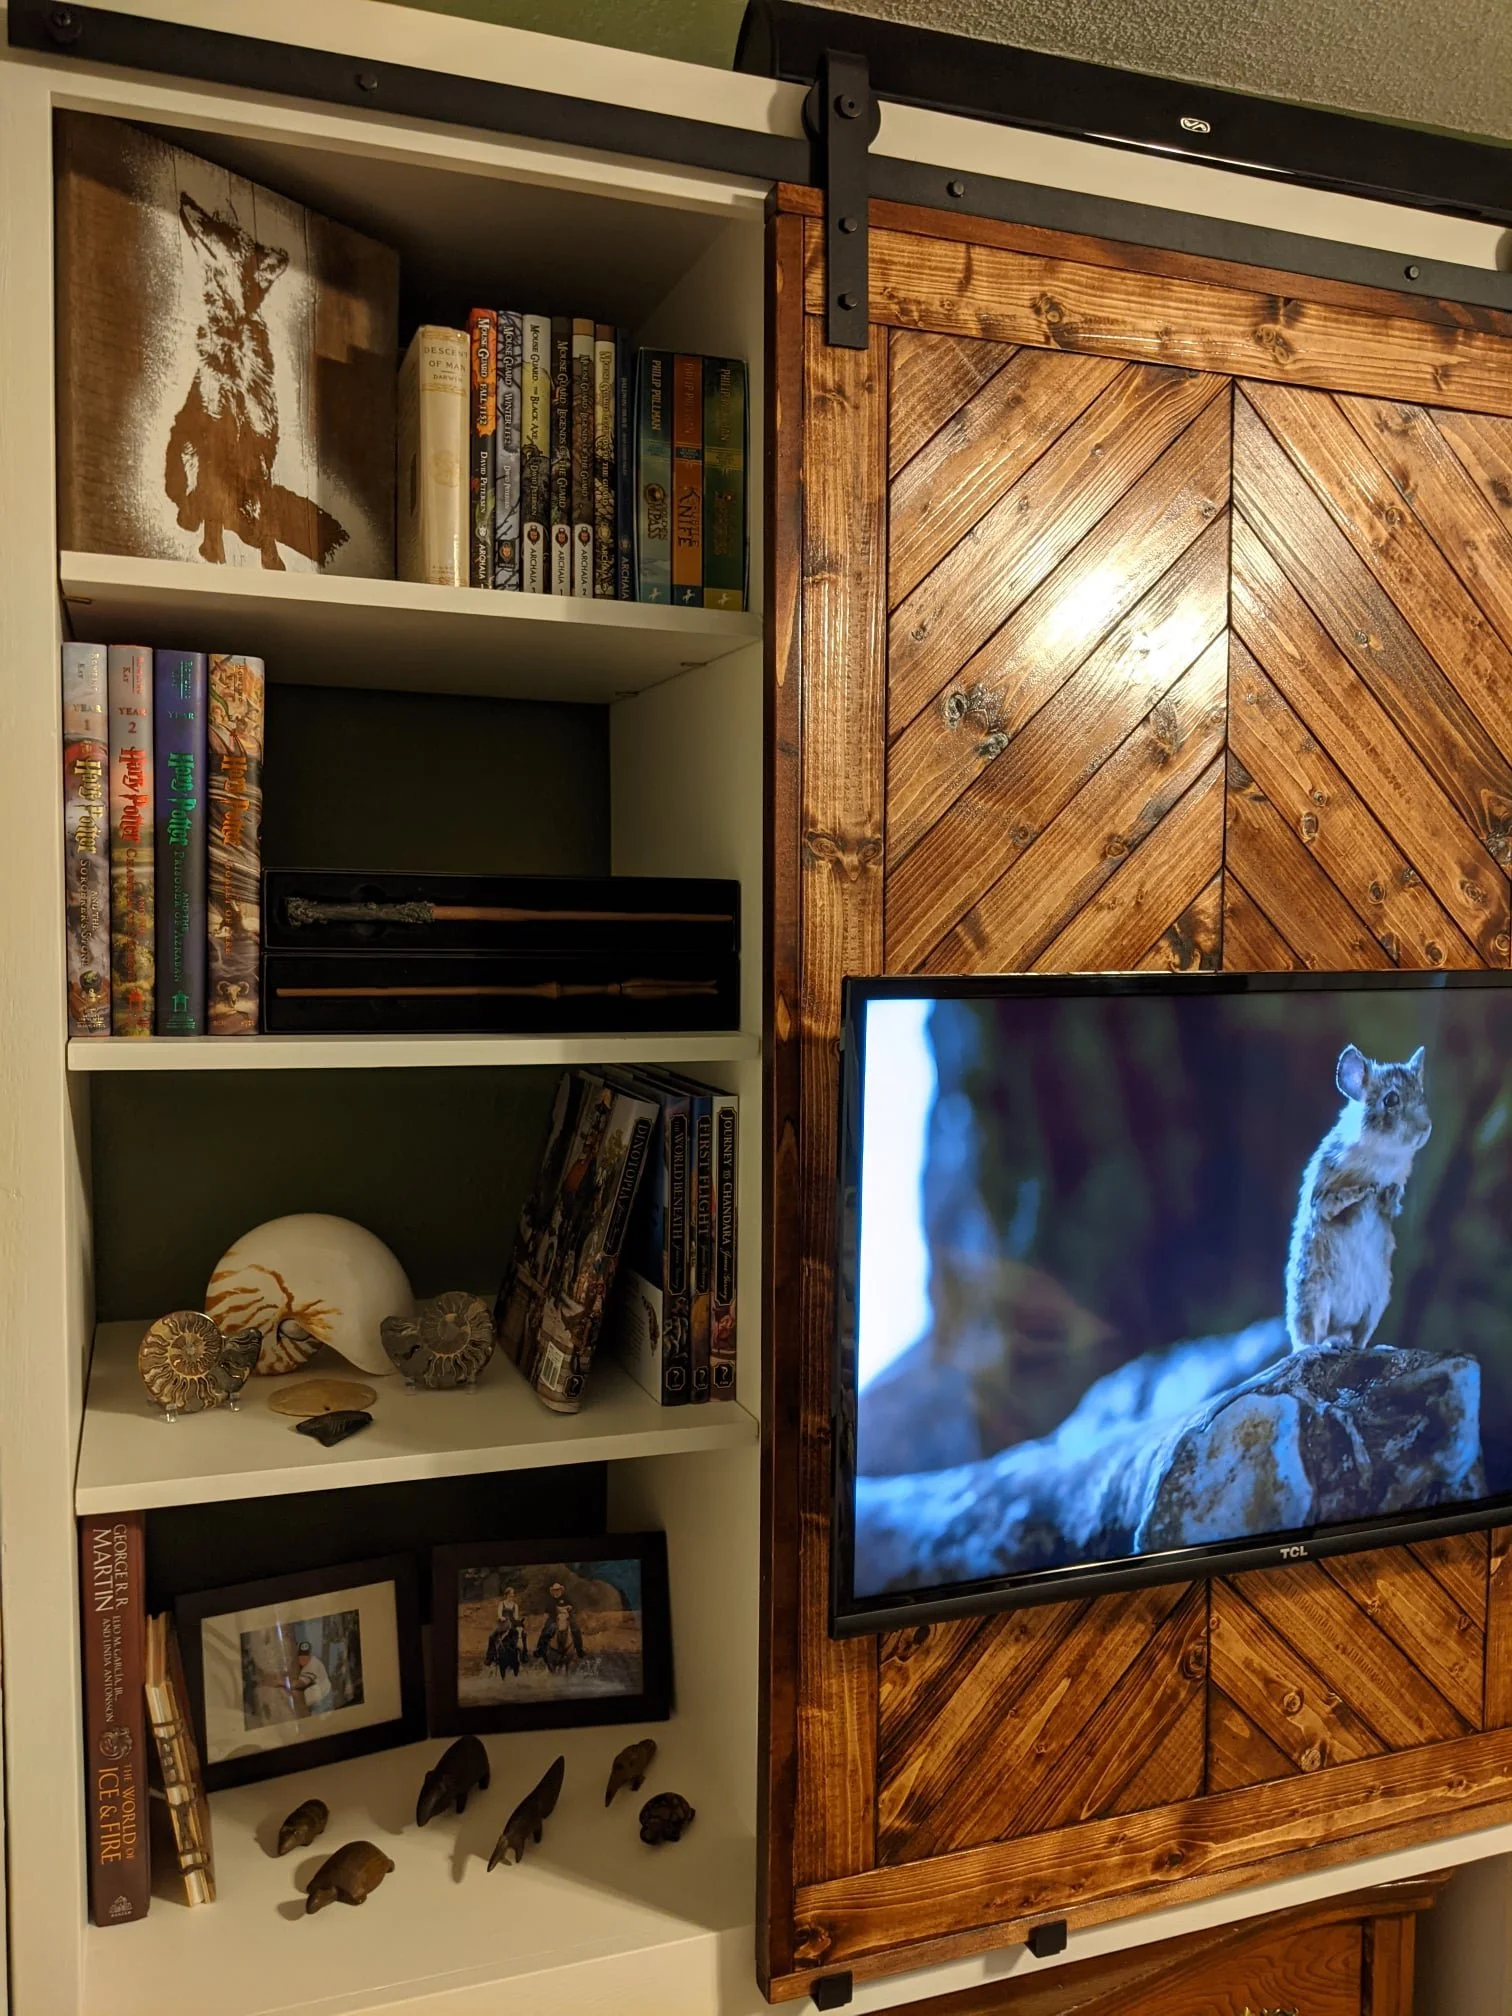
And success! We had a finished entertainment center. We filled the left side with some of our favorite books and knick-knacks. Most we still had packed away since we moved here. Feels great to have them back. This also shows how that secret middle compartment is never visible. Exactly as we envisioned it.
Here's the sliding door in action.
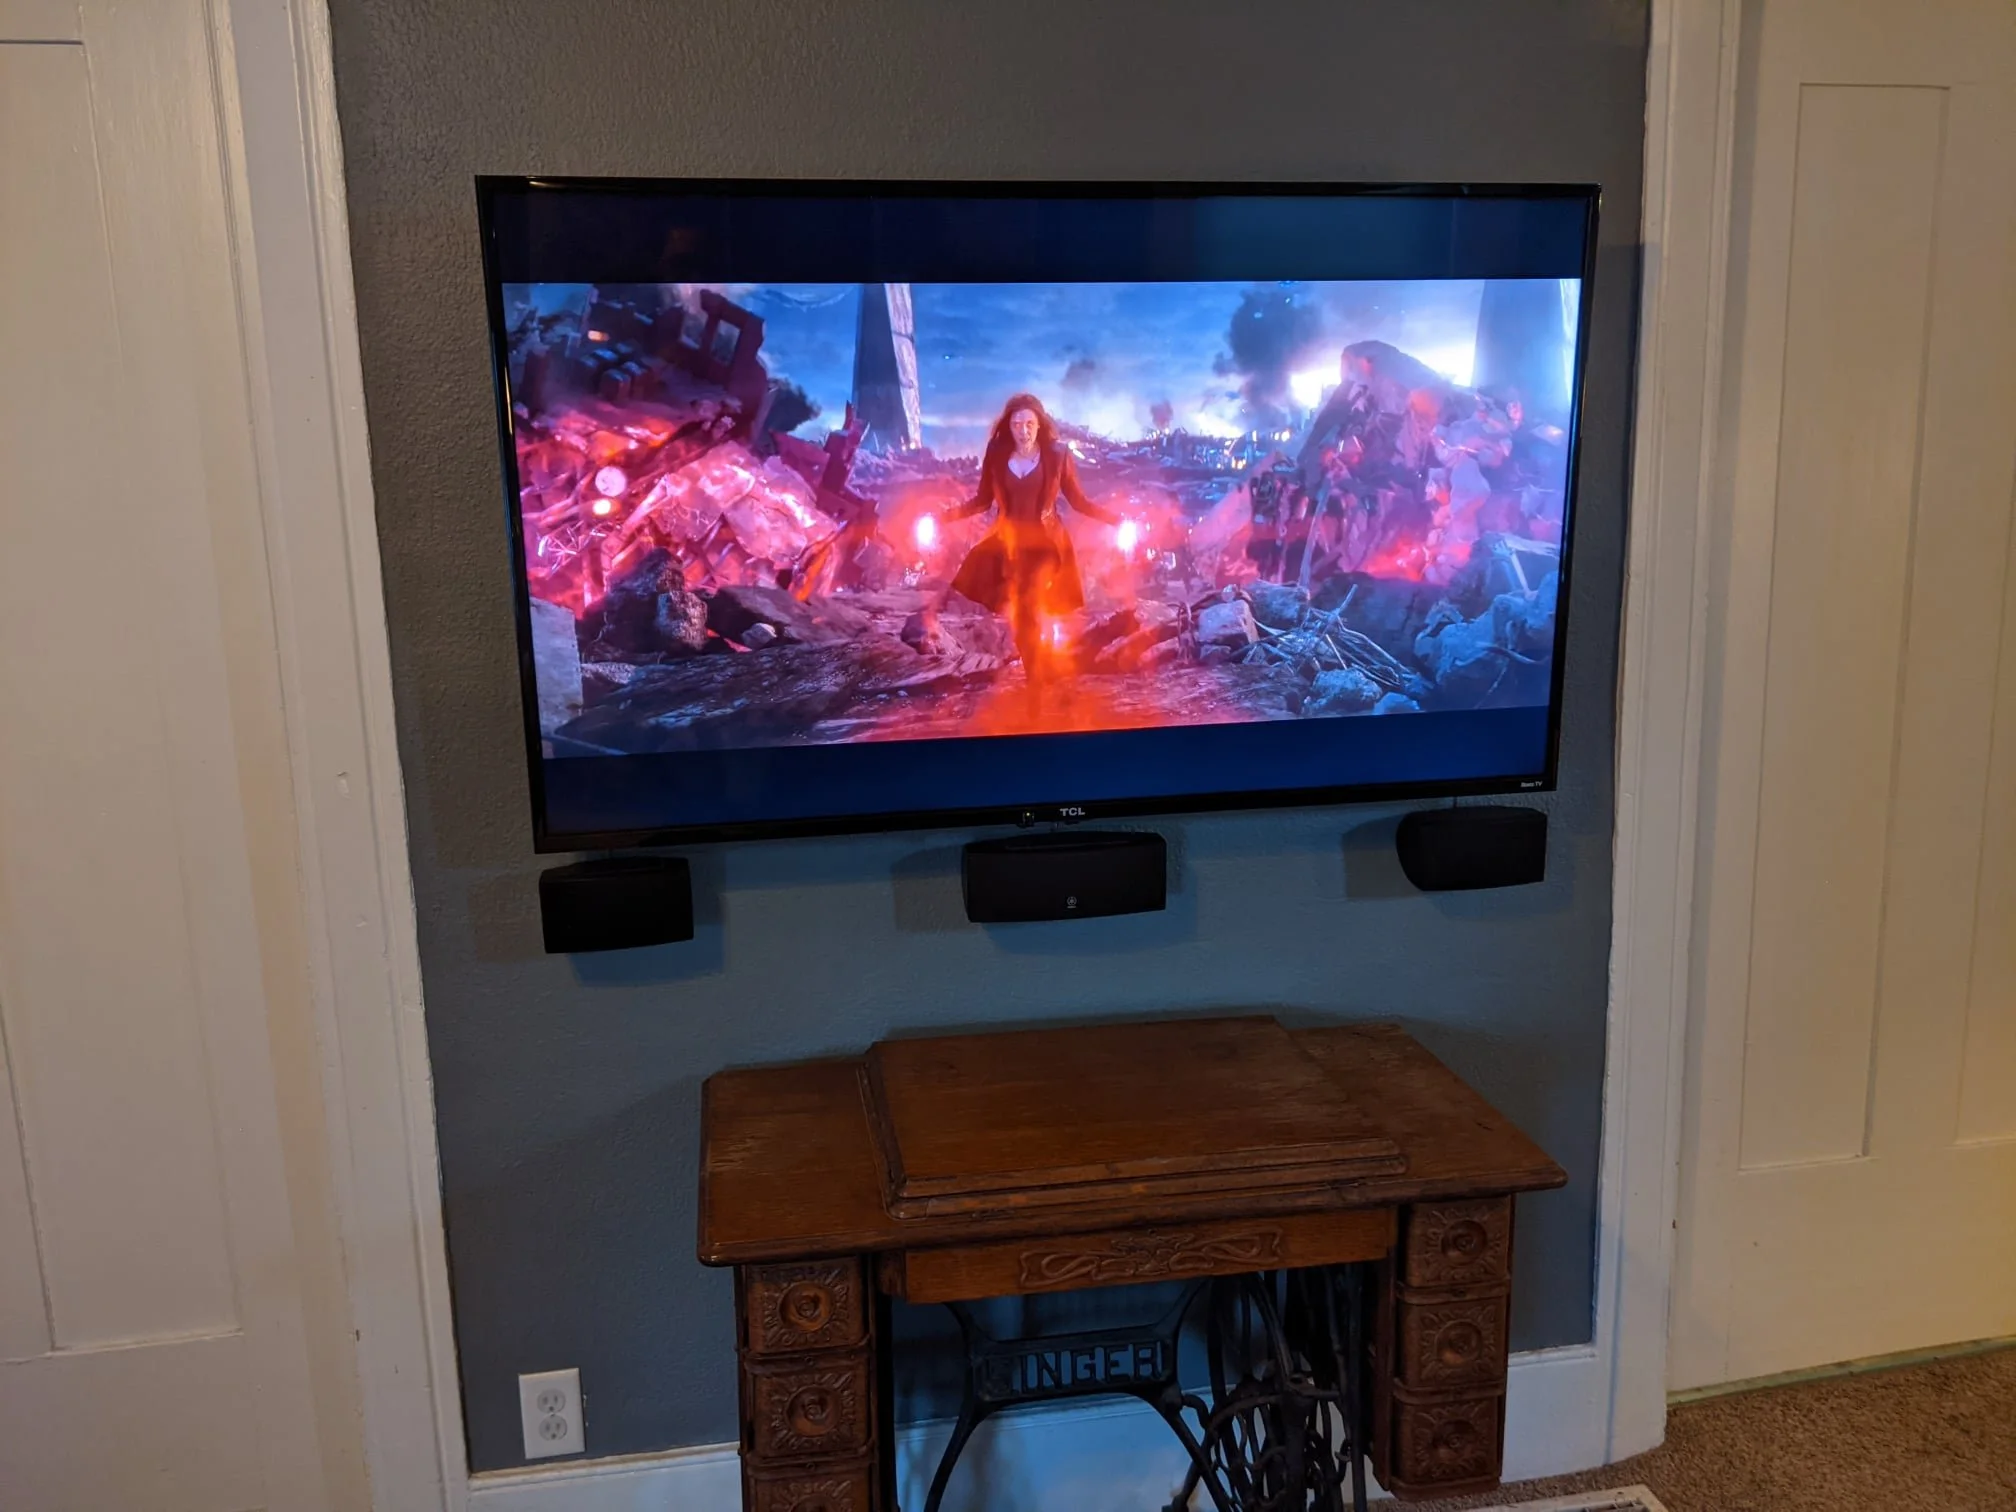
And this is what the TV looks like on the other side of the wall in our living room.
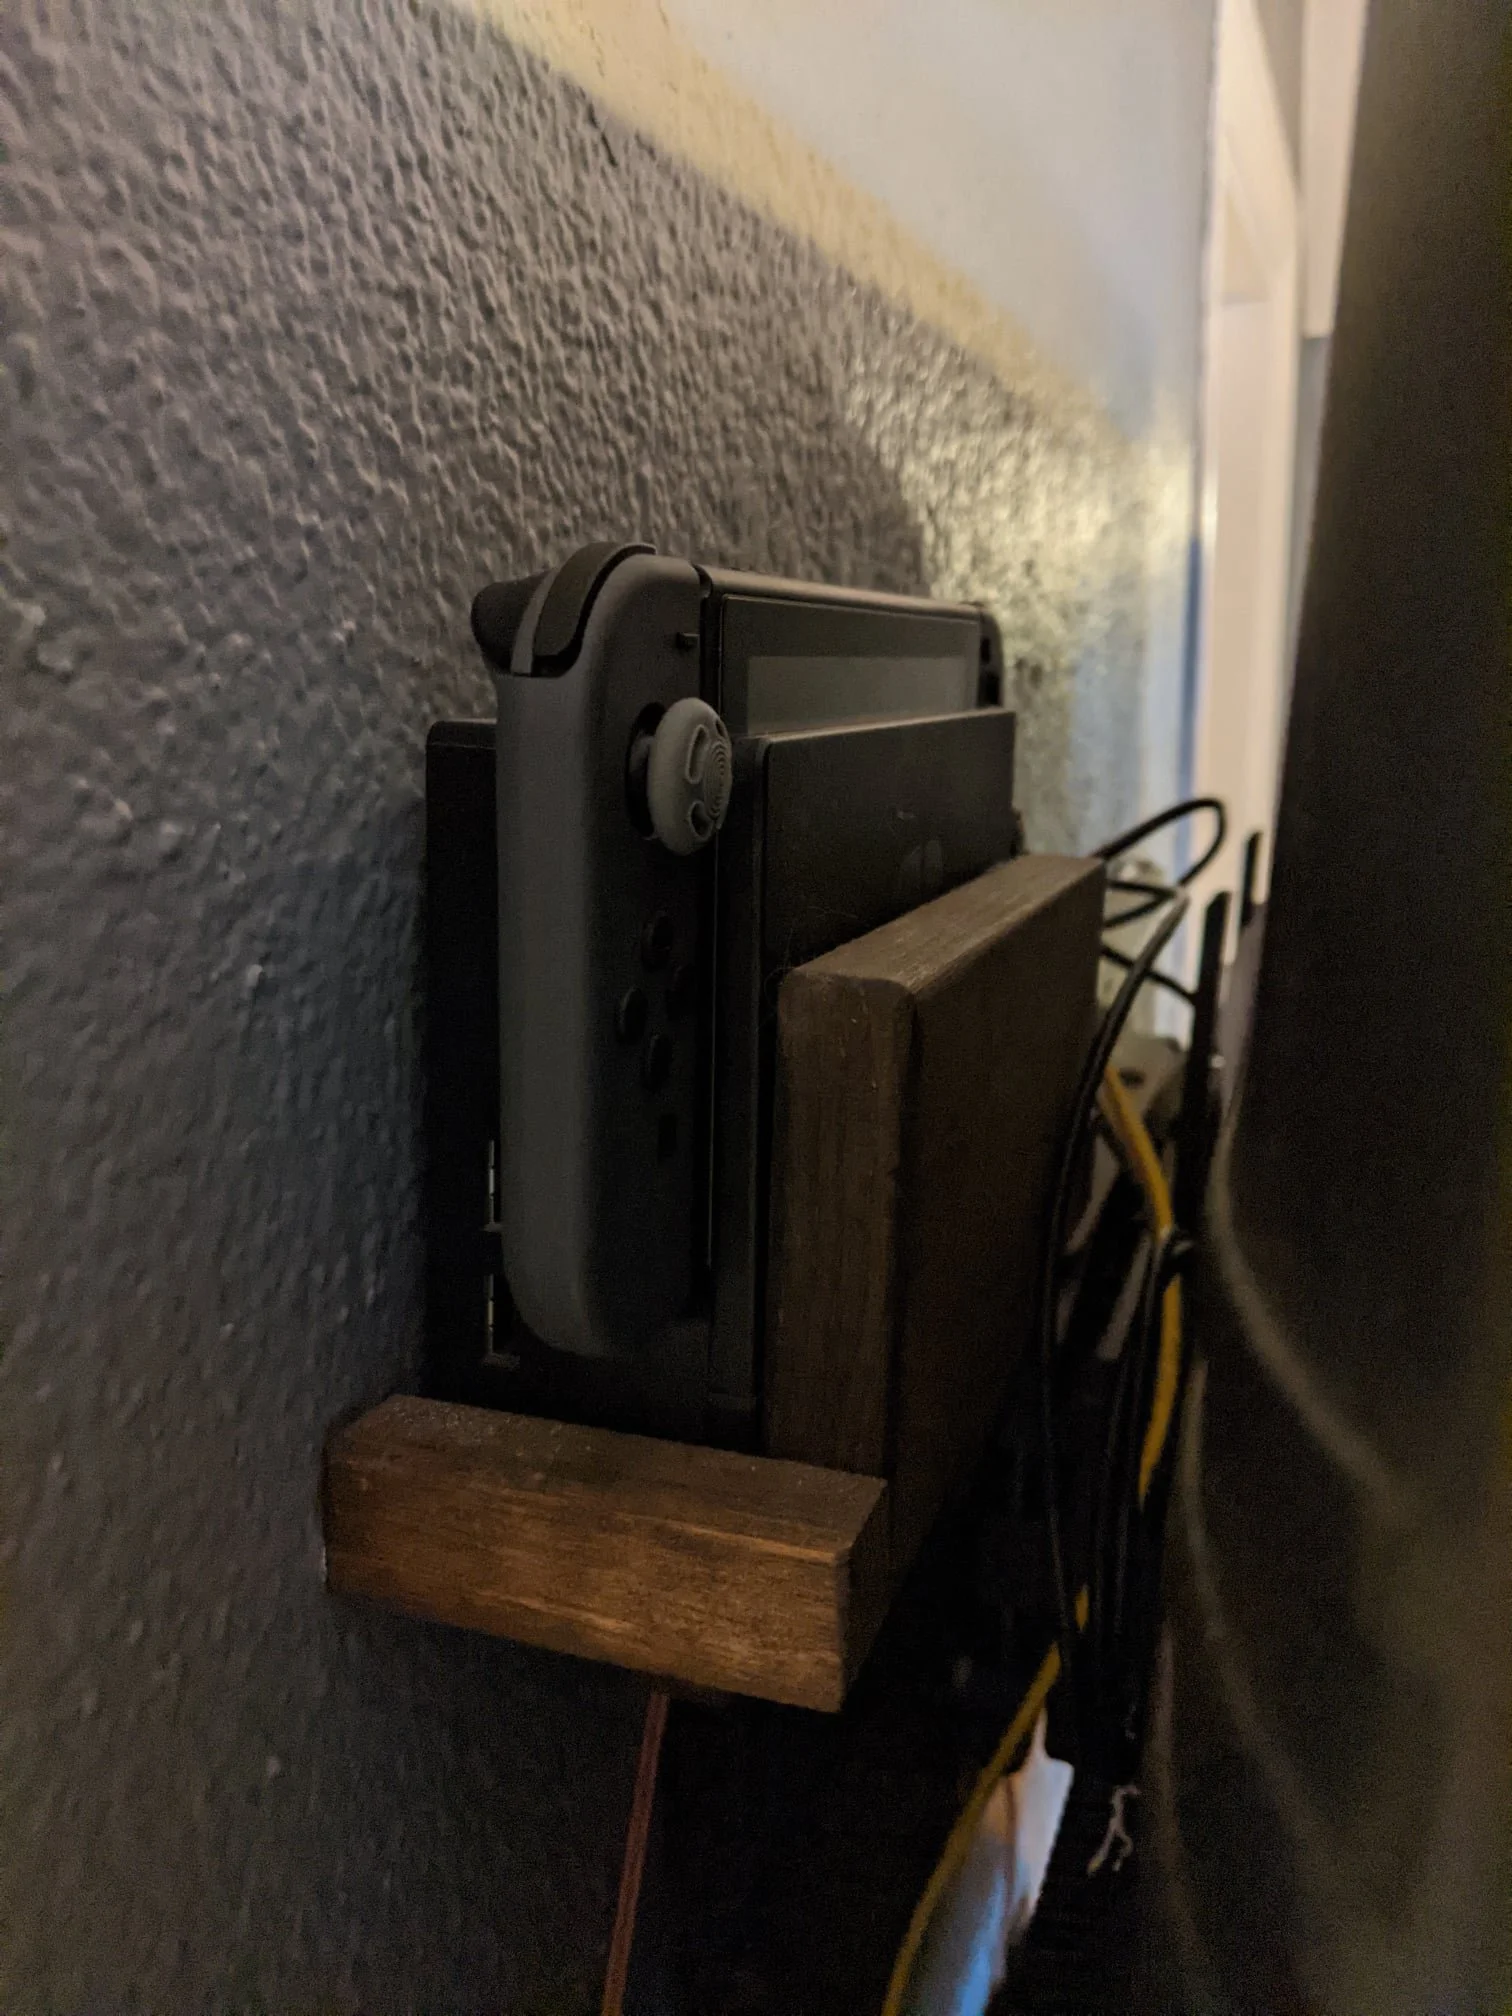
Bonus project: This little Switch dock mount is hidden behind the living room TV. Keeping it in the entertainment center causes issues because the thickness of the wall interferes with the joy-con signals. There is another dock in the entertainment center if you want to play the Switch on the bedroom TV.
With a house this old, usable space is extremely valuable, so projects like this allow us to reclaim other less efficient spaces. We have all kinds of plans for more improvements like this in the future. Follow us on Instagram or TikTok to see more of our projects!